
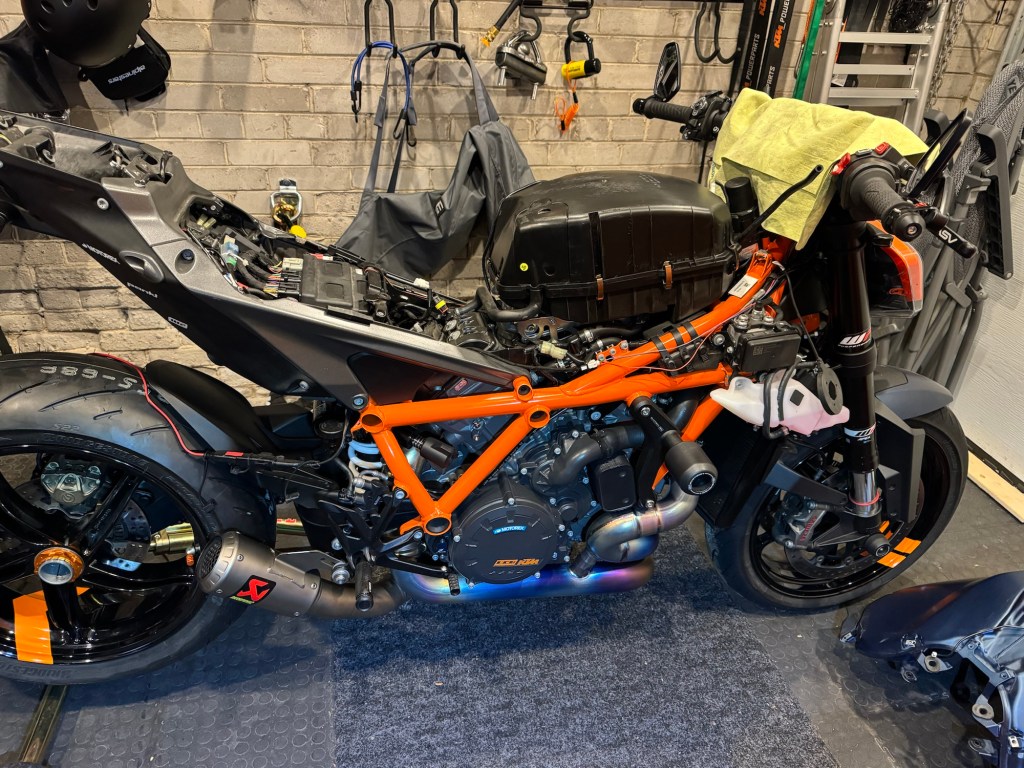
In this ChanceMoto DIY, we’ll be walking through a step-by-step replacement of the air filter on a 3rd Gen (2020-2023) KTM 1290 SuperDuke R. It’s a fairly easy maintenance item but does require the removal of 3 body panels as well as the fuel tank which can be tricky. Plan for 90 minutes to 2 hours to complete.

Tools required: Large and small flathead screwdrivers, T30 torx, ratchet, extension, 4mm hex, 8mm wrench.
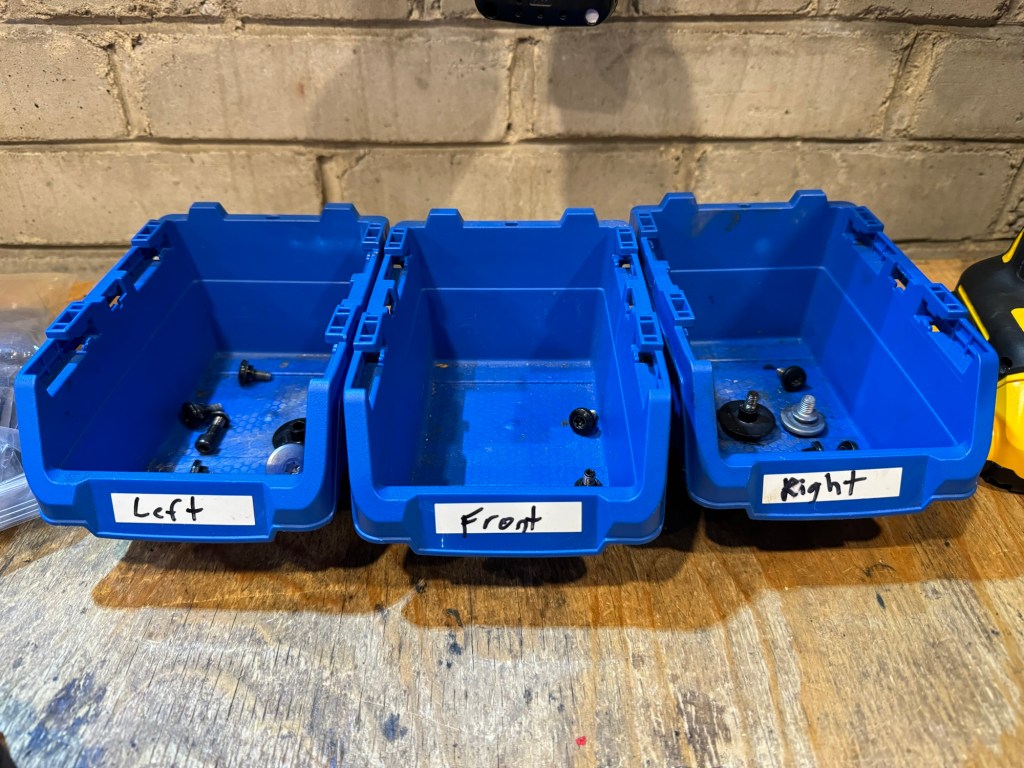
You’ll be taking a bunch of bolts off that secure 3 body panels to the bike. A few labeled bins or jars is a handy trick to make sure you put everything back correctly and don’t mix up or loose any bolts.
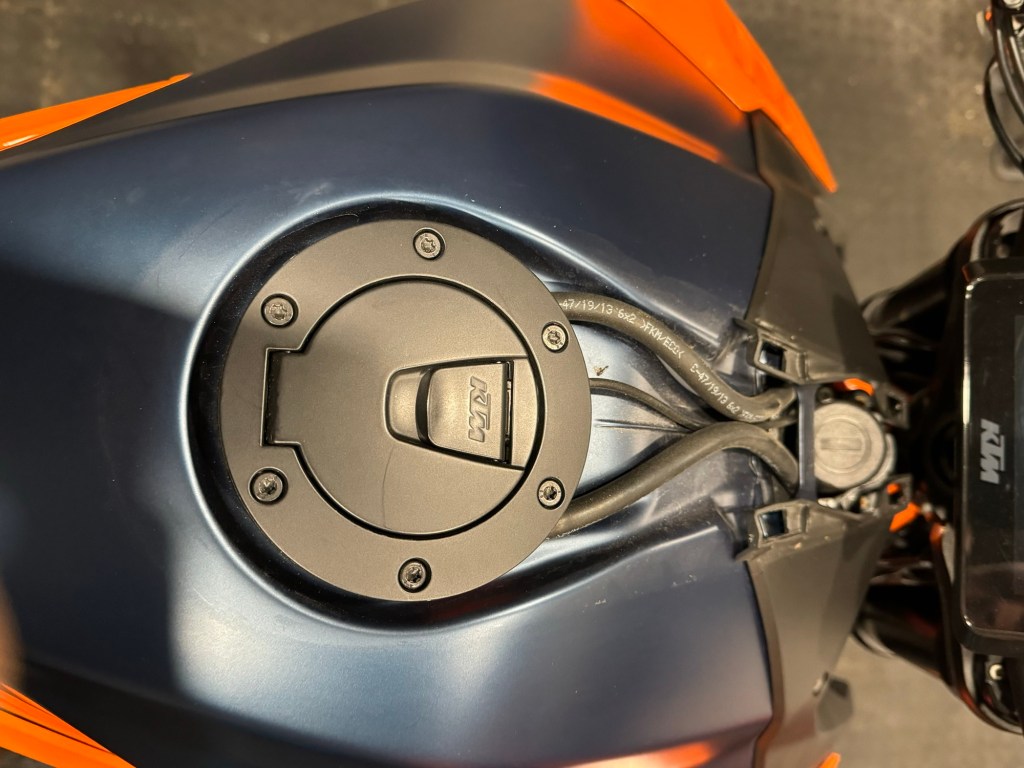
Step 1: Remove the key guard / tank cover
Remove the plastic cover by gently pulling up on it (you do not need to remove the 6 bolts around the fuel cap). If you’ve never removed this piece before, it can be tricky and you don’t want to break any of the plastic tabs that secure it in place. The cover is most easily removed by hand and using tools will increase the odds of damaging it. Start by pulling up from the front of the bike while wiggling the plastic so that the tabs come loose. It should pull right off with a little coaxing.
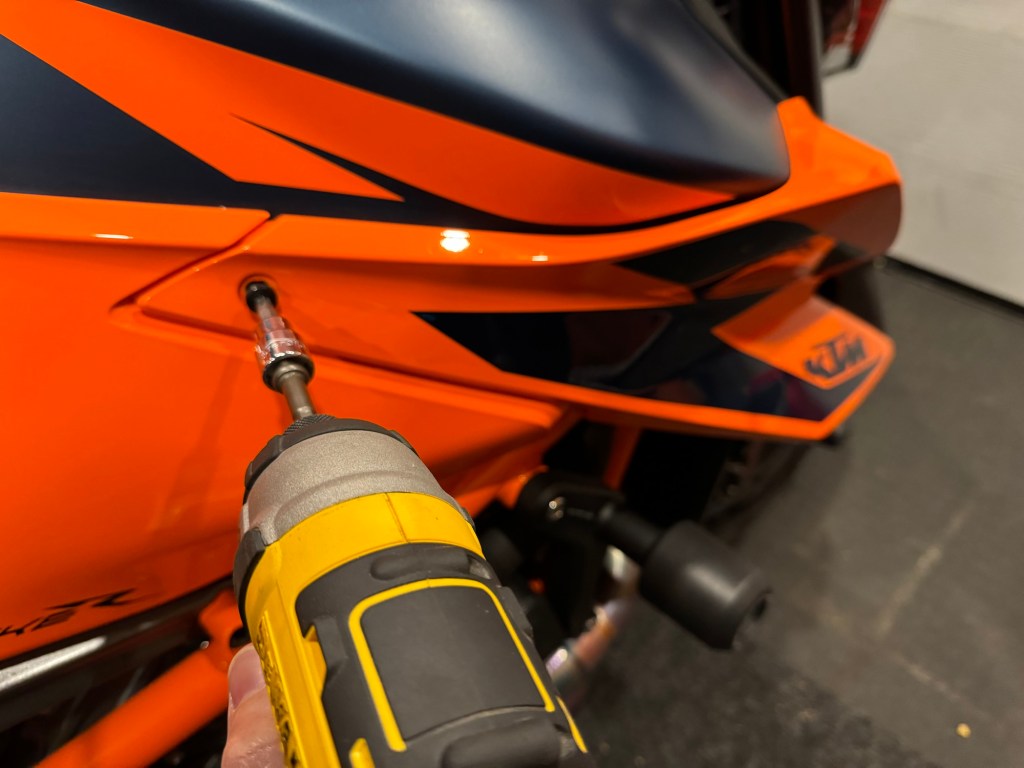
Step 2: Remove the right side panel (1st panel)
Starting on the right side of the bike, remove the first body panel which is held in by 5 bolts (4 of which are now visible and 1 that’s underneath the panel near the radiator).
The handlebars may get in the way when trying to access some of the top bolts so turning them to the side will make your life easier.
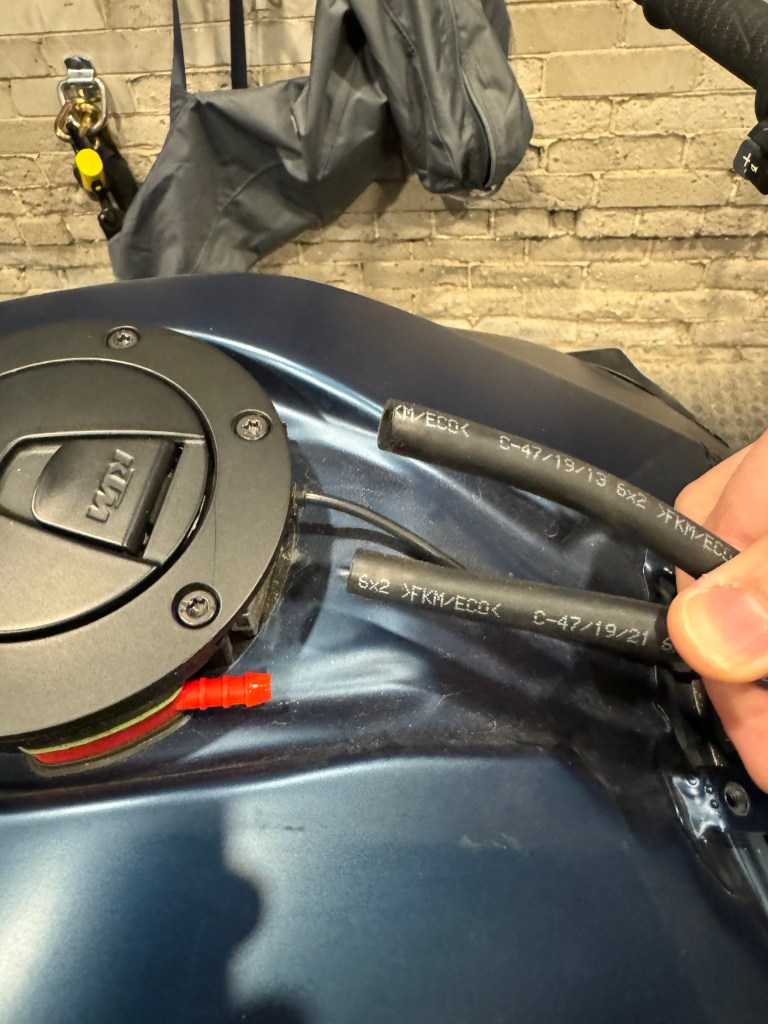
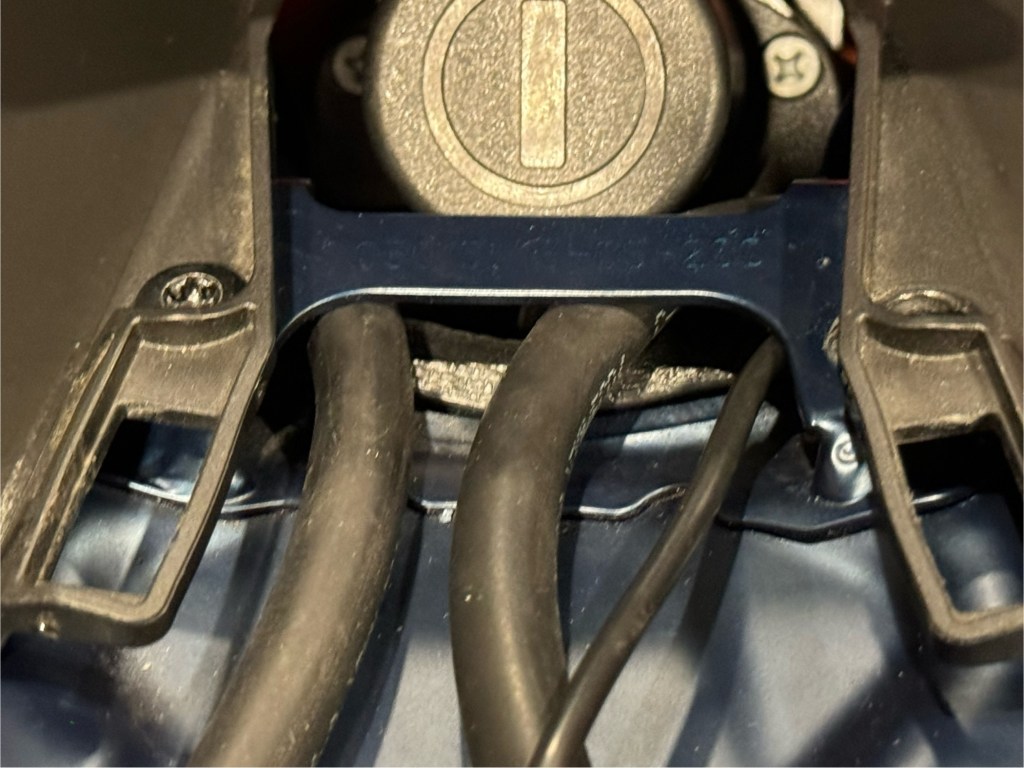
You will also need to disconnect the 2 breather hoses that connect to the OEM fuel cap. There is no hardware holding them in place so just pull them off.
The next step to remove the right side panel from the bike is to lift up near the “key” as there is a male connector on the panel that plugs into a fitting on the bike.

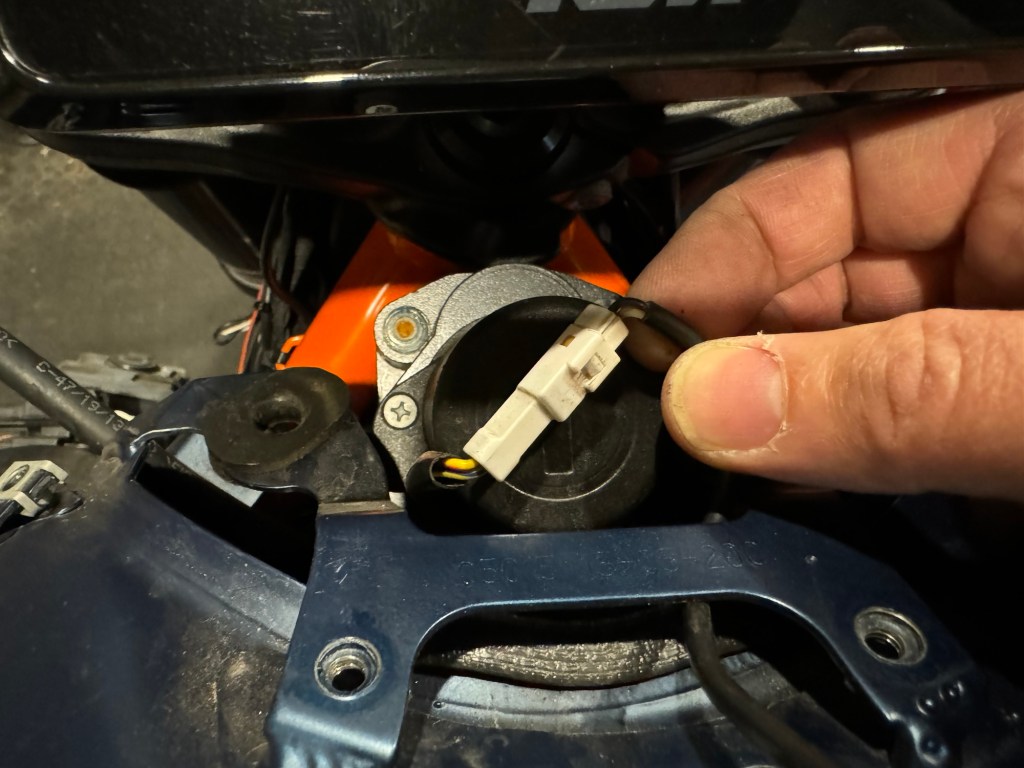
The final step to remove the right side panel is to remove the keyless ignition sensor which is the round device that’s secured by 3 clips. Squeeze the plastic clips inward and rotate the sensor to detach it from the panel. You can just let the sensor hang there for the time being as it won’t be in the way. Put the right side panel aside somewhere out of the way so you don’t step on it!

Step 3: Remove the left side panel (2nd panel)
Repeat the process you did on the right for the left side panel. Everything is the same but there is no key sensor on that side so one less thing to worry about.
Step 4: Remove the tank protector panel (3rd body panel)
In preparation for step #4 (removing the fuel tank), you might as well disconnect the power to the OEM fuel cap sensor which is at the front of the bike where you disconnected the breather hoses. This is most easily accomplished with a small flat head screwdriver which you can use to press the male connector down so you can then pull them apart.
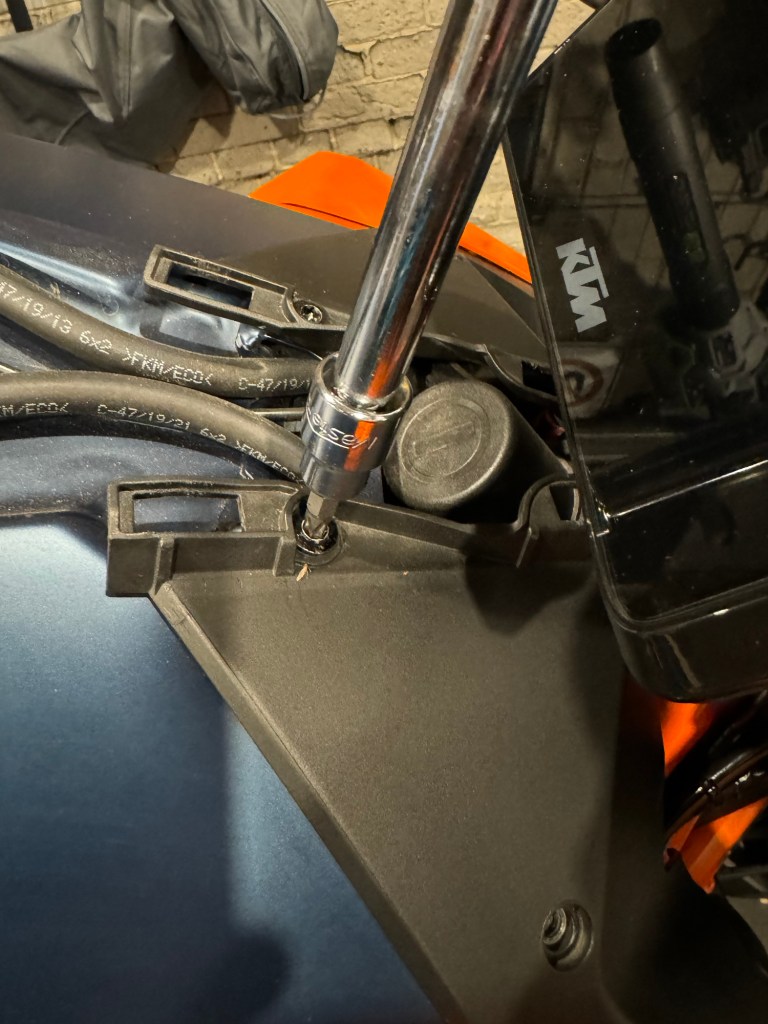
Remove the large bolts at the left and right sides of the panel.

Remove the driver and passenger seat to expose the 4 bolts that secure the tank panel to the frame. The passenger seat or cover is removed by using the keyway under the tail and the driver’s seat is released via a cable latch located under the passenger seat.
You can then proceed to remove the 4 torx bolts that were under the seat. Note that the 2 front bolts also secure the fuel tank to the frame in addition to securing the driver’s seat clip which we will talk about later during re-assembly.

Remove the tank protector panel and set it aside, along with the first 2 panels you’ve already removed.
Step 5: Remove the fuel tank
The last 2 bolts you need to remove to get the tank off are at the front of the bike near the steering head. These are most easily reached with an 8mm wrench.

The tank is now loose but you’ll need to remove a few connectors before you can lift it off the bike. On certain motorcycles, the air filter can be reached without removing the fuel tank but this is not the case on the 3rd Gen 1290 SDR due to the airbox design.
Remove the main fuel line, located on the left side of the bike. Squeeze the metal clip to release it and have a shop towel handy to catch the ounce or so of fuel that will inevitably spill out.

The last 2 connectors you need to remove are at the back of the tank. You will need to lift the tank in order to access them. This step will be easier if the tank is empty (lighter) and/or if you have a set of helping hands available.
Before moving the tank, throw a towel or shammy over the display screen and the handlebars in order to prevent it from getting scratched as you’ll be working the tank very close to it.

The black connector can be popped off easily with your fingers by releasing the tab. The white connector can be disconnected using the same flat head screwdriver trick as we described for the fuel cap sensor.
Lift the front of fuel tank high enough to allow the rear to release from the frame, being careful not to scratch the screen or bash the switchgear on the handlebars. Set the fuel tank aside somewhere out of the way and be careful not to dent or scratch its delicate finish.
Step 6: Remove the airbox lid
The airbox lid is held in place by several metal clips that “pop” off. A flathead screwdriver makes this easy but you could probably use your fingers as well. Note that the clips are NOT attached to the airbox tray so be careful when releasing them as they can fall off and are tricky to re-attach (especially those at the front of the bike).

Step 7: Remove the air filter
With all the clips removed, lift the airbox lid to expose the throttle bodies, “shower head” fuel injectors and finally, the air filter. Gently pull up on the air filter to release it. A steady hand is a good idea here as you don’t want any dirt/debris that’s trapped in the filter to fall into the airbox (or throttle bodies).
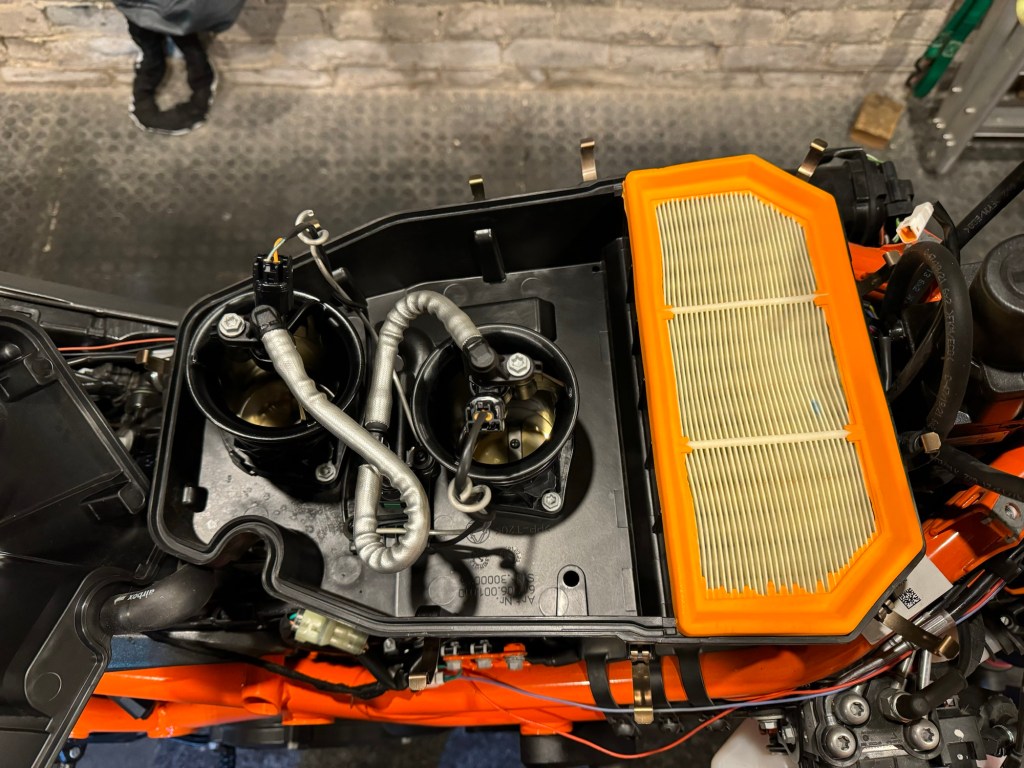
In this case, the OEM air filter looked pretty clean after 3 years/16K kms but good to replace it anyway. With the air filter removed, use a damp cloth to wipe out any dust that’s visible in the airbox or in the intake runners (under the air filter).
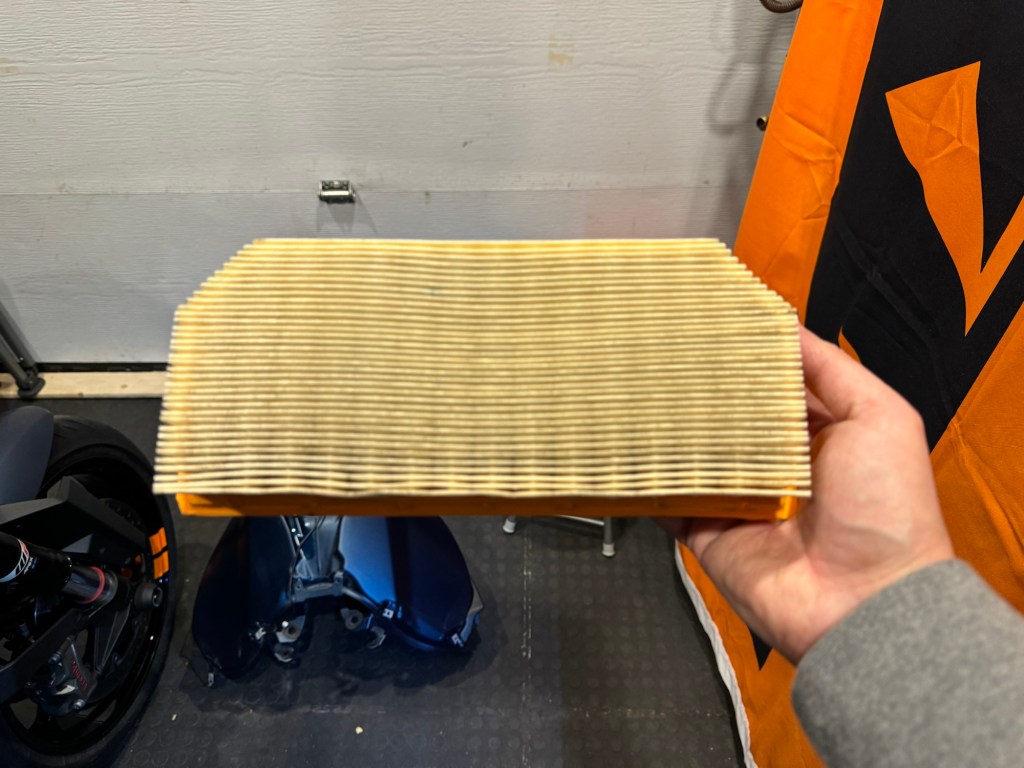
Step 8: Install the new air filter
We replaced the OEM filter with a BMC FM01100RACE but there’s nothing wrong with the flow of the OEM filter and there are also other good reusable aftermarket options. Press the filter into the airbox so that it seals tightly against the lower airbox tray.

From this point, we’re going to start re-assembling the bike which is as simple as performing the prior steps in reverse order (with a few nuances).
Step 9: Replace airbox cover
Replace the airbox lid and make sure there’s a tight seal all the way around (especially at the front). If it doesn’t close properly, you may not have pressed the new air filter in properly. Once everything is aligned, start replacing the metal clips all the way around the airbox. You should be able to fasten them with your bare hands and pressing down the cover makes them clip in more easily. Each clip should seal with an audible “click” to confirm its in locked in place and tight.
Step 10: Replace the fuel tank
This is the trickiest step of the whole process, made a lot easier by having a 2nd set of hands available. Again, make sure the display screen is covered so you don’t scratch it when manoeuvring the tank back into place.
Start at the back of the tank by re-connecting the black and white connectors, then the main fuel line on the left side of the bike. If doing this alone, you may fit it easier to have the fuel tank sideways over your knee to make the connections before lowering the tank into place.
Make sure the fuel line connector “clicks” to confirm it’s properly seated so that fuel will flow freely. Slide the back of the fuel tank in place, making sure to not pinch the fuel line or any of the connector wires at the back.
Once the back of the fuel tank is in place, gently lower the front and check to ensure it’s aligned with the mounting holes at the front and back. Route the breather hoses for the fuel cap through the tank stanchion and re-connect the white fuel cap sensor connector.
Before you bolt the fuel tank to the bike, you can actually start it for 10 seconds to ensure that fuel is flowing. If the bike doesn’t start, check the main fuel line connection. You should not get any fault codes or error messages on the dash and the bike should start on the first try.
Step 11: Replace the tank panel
This process is the inverse of the removal but you will notice that the seat clip moves around if you try to tighten 2 bolts that secure it to the tank. In order to get access to the piece (so you can steady it with your hand), you’ll need to pull out the ECU. It’s held in by 2 rubber grommets that secure it to the plastic tray underneath. Remove the ECU by pulling straight up and ensure you don’t pull out any of the wiring harnesses that feed into it.

Once you’ve hand-tightened the 2 tank bolts, replace the ECU by pressing the rubber grommets back over the plastic tray and triple-check the wiring harness connectors to ensure they’re tight. If they come loose, your dashboard will throw all kinds of fault codes so best to be cautious here.
Step 12: Replace the left side panel
Clip the panel in place Replace the 5 bolts and hand tighten. Use blue loctite if you want to make sure they don’t vibrate loose.
Step 13: Replace the right side panel
Repeat the same process as with the left side panel, remembering to re-attach the keyless sensor which is simply pressed in and rotated so that the 3 plastic clips lock it in
Step 14: Replace the key guard cover
Clip the cover in place, starting at the front and working towards the back. It can be a little finicky as it needs to join the left and right panels together at the front.
Step 15: Install the driver and passenger seats
Install the driver’s seat and ensure the front is correctly seated under the previously discussed “seat clip”. The passenger seat or rear cover simply clips into place. Don’t forget/leave your key under the tail of the bike as we often have!
Hope this DIY was helpful and ride safe out there!

Nice tutorial! Could you do one for an Aprilia RSV4?
LikeLike
Funny you should ask – I just did the filter swap on an ‘18 RSV4 track bike. Removing the track fairings is obviously quite a bit easier than the street bodywork. The main difference on that bike is that you don’t need to remove the tank and can simply cantilever it, disconnecting the front and using the back as the pivot point. That airbox is held together with screws so remove the ones at the front, then pull the airbox cover up enough to access the filter and replace it. Easier job than on the 1290 SDR due to that.
LikeLike