In this Chance Moto DIY, we’ll be doing a detailed step-by-step walkthrough on how to perform an oil change on the KTM 1290 (LC8) motor. This procedure was performed on a 2018 Super Duke R but will apply to any of the 1290 bikes (1290 Super Duke GT, 1290 Super Adventure, etc).
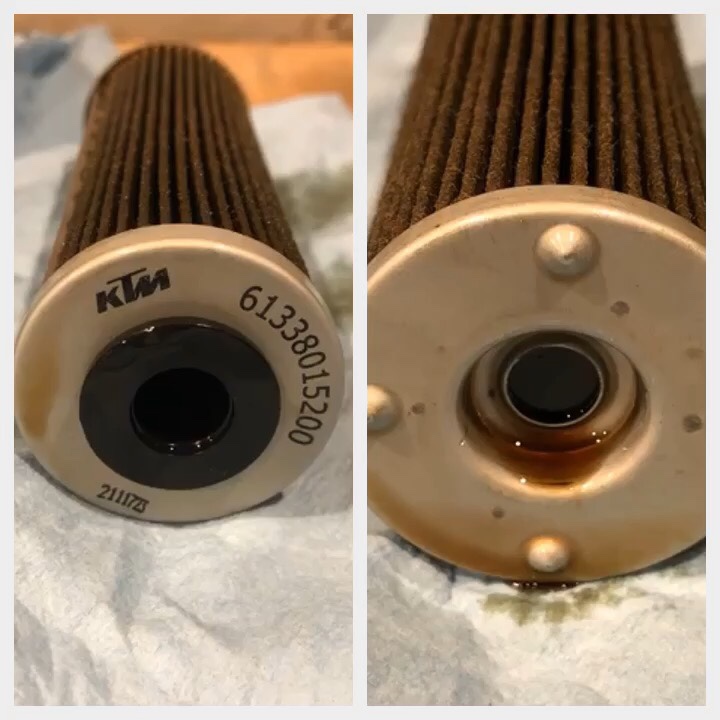
Supplies you’ll require for this DIY are 1) fresh oil (~3.5L) of your choice and 2) a new oil filter cartridge (KTM part # 61338015200). Optional replacement (wear) parts are the rubber gaskets for the 2 oil drain bolts and oil filter cover which are included in the KTM Oil Filter Service Kit (KTM part # 00050000068).

Required tools:
- T30 Torx
- 13mm socket
- Ratchet w/extension
- Pliers
Also Recommended (optional):
- Torque wrench
- Reverse/Snap Ring pliers (for oil filter extraction)
- Tin foil (to cover exhaust as shown below)
You’ll also want the usual assortment of shop towels, an oil drain pan, pig mat, disposable gloves and a funnel.

Preparation:
- As with any oil change, the oil will flow out of the bike much more quickly and effectively if it’s hot, so either take it for a ride or let it warm up for 5 minutes
- Put the bike on a paddock stand or on its side stand
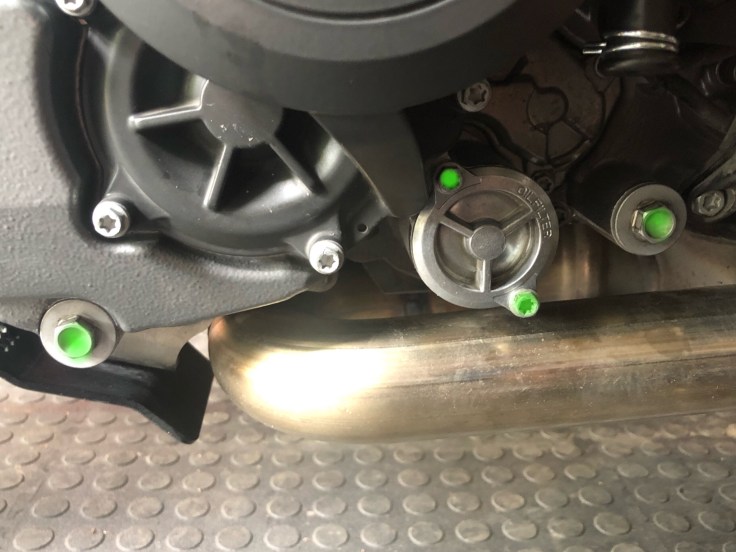
- On the left side of the bike, locate the oil drain bolts and oil filter cover (as shown below)
- Remove the oil filler cap to increase flow of oil out of the motor
Step 1:
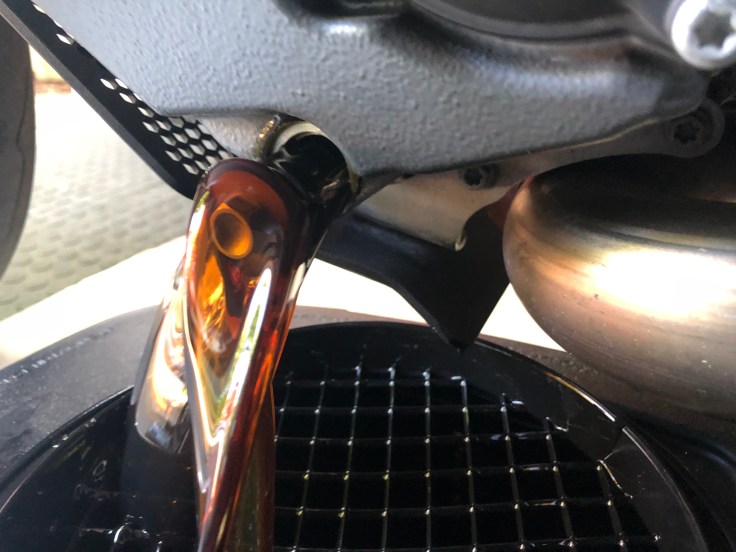
- Pull the left oil drain bolt
- If you release it slowly, you can avoid a hot oil deluge and resulting mess
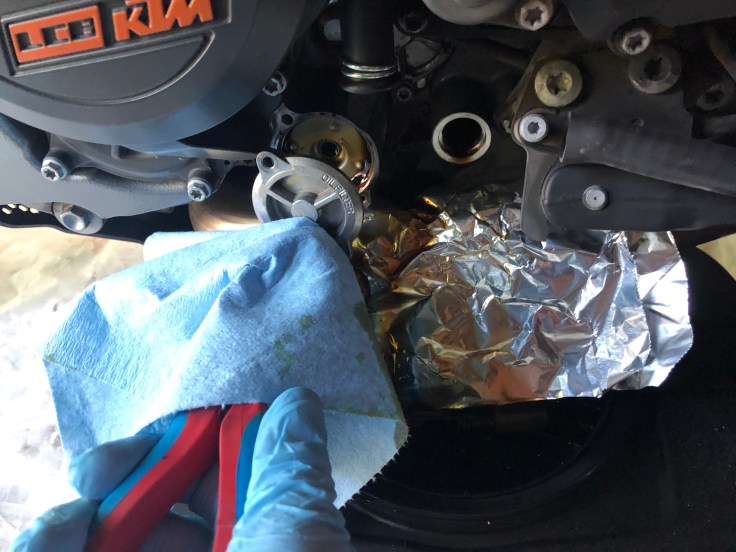
Step 2:
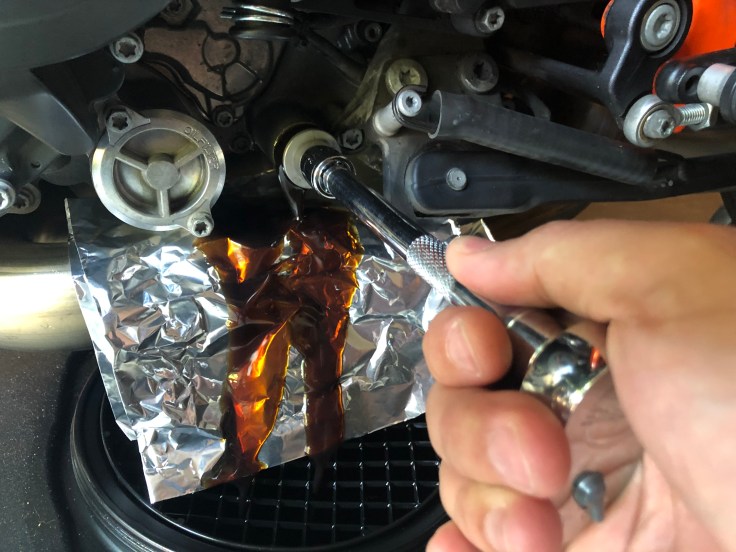
- Cover the exhaust with some tin foil
- Pull the right oil drain bolt
Step 3:
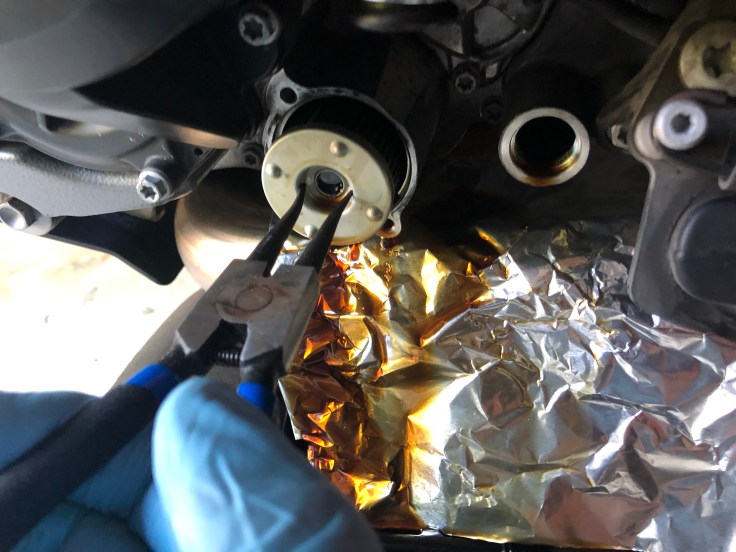
- Remove the 2 x T30 Torx bolts that hold the oil filter cover in place
- Using a set of pliers (and shop cloth, to avoid scratching), pull the oil filter cover off
- Once the cover has been removed, pull out the oil filter cartridge using the reverse pliers
- If you do not have a set of reverse pliers, you can try using regular pliers…in reverse
- Take note of the asymmetric nature of the filter cartridge as you will want to ensure correct orientation when inserting the new one
- With both oil drain bolts and the oil filter removed, let all the oil drain from the bike
Step 4:
- Clean an inspect the oil filter cover gasket (black rubber seal)
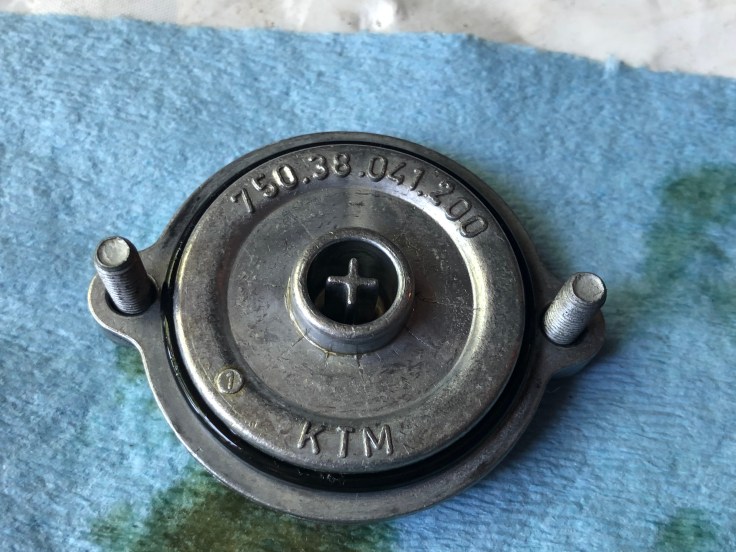
- Clean and inspect the oil drain bolt gaskets (x2)
- Keep an eye on the 3 rubber gaskets, as they degrade with time and will eventually result in leaks (KTM replacement part # 00050000068)
Step 5:
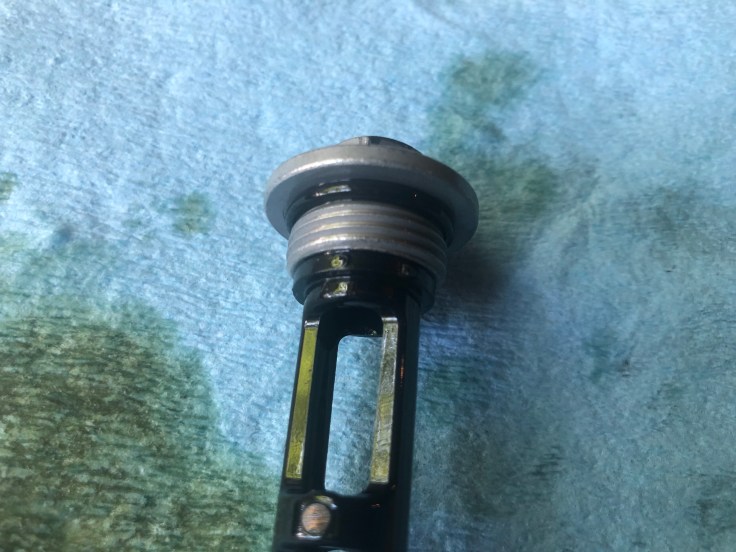
- Insert the new oil filter cartridge, paying particular attention to the orientation
- The cartridge goes in with the open end (with rubber seal) on the inside and the solid ring facing out
- If you’re meticulous, you can pre-pour a little oil into the filter to get the media saturated (optional)
- Wipe the cover’s mating surface clean (on the motor) to ensure no debris will interfere with the seal
- Replace the oil filter cover by hand-pressing it on and orienting it so that the bolts have a clear path to the threads through the cover
- The cover should fit snugly on the motor before you insert and tighten the bolts
- Hand tighten the 2 x T30 Torx bolts -you do not need to torque them
- Their purpose is only to hold the cover in place, so the required torque is probably less than you think
Step 6:
- Wipe the mounting surfaces clean for the oil drain bolts
- Replace the 2 x 13mm oil drain bolts and torque to 20nM
- Wipe all residual oil off the motor -this will make it easier to check for leaks in the latter steps
Step 7:
- Begin refilling the oil
- Unless you measured how much came out of the bike, you can begin by adding 3L
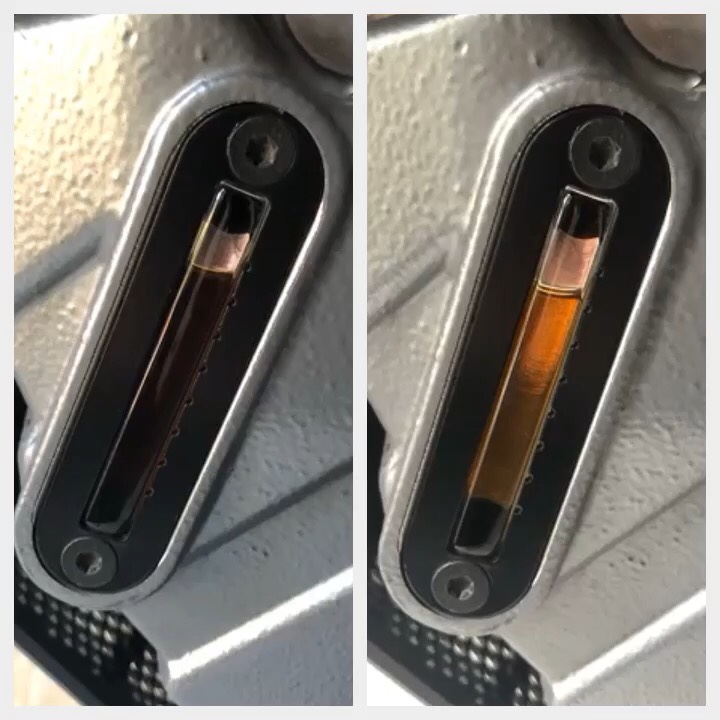
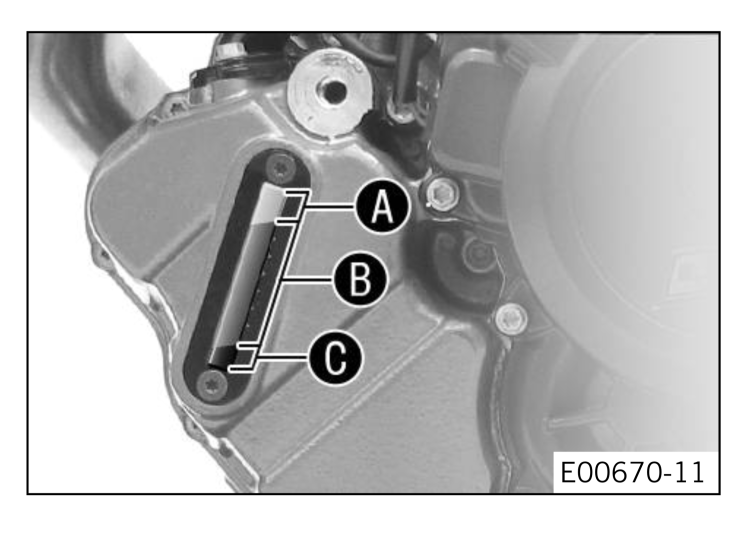
- Due to the location of the sight glass, it’s normal for it to look like the bike is over-filled until you’ve run the bike to circulate the oil
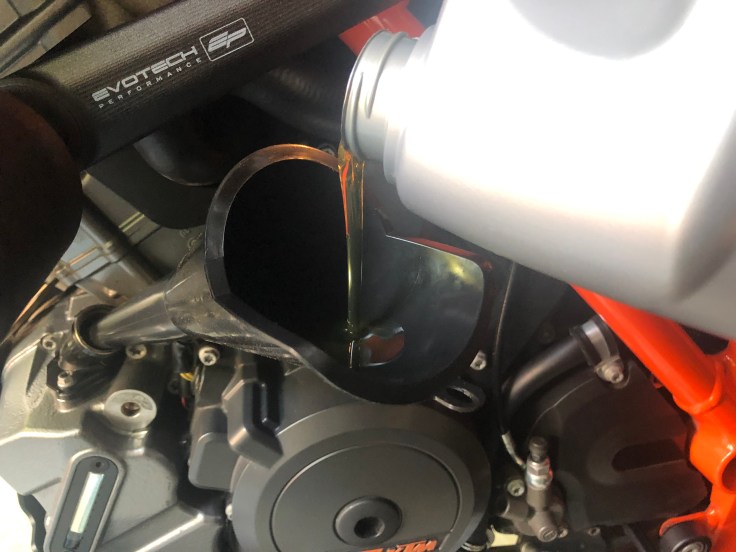
- Put the oil fill cap on and start the bike
- Let the bike run for 30 seconds to get oil circulating throughout the motor
- Turn the bike off and wait a few minutes for the oil to settle
Step 8:
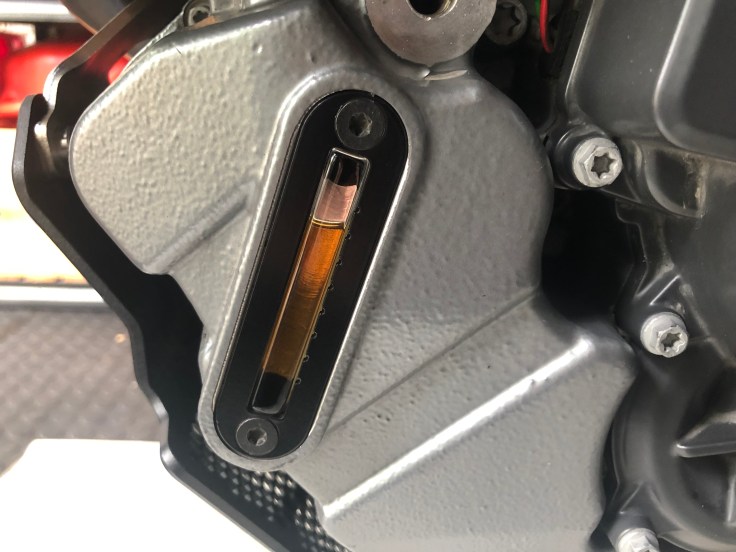
- With the bike level (and not on the side stand), top up the oil to the recommended level, using the sight glass
- KTM’s manual states that the oil level should be between the 1st and 2nd hash mark from the top
- Once you’ve reached the correct oil level, run the bike for 1 minute to ensure that the oil has completely circulated and that the oil filter is saturated
- This is a good time to check for any leaks
- Turn the bike off, check the oil level one more time and top up as needed
Step 9:
- Clean up and go ride!

Thanks for the breakdown. You covered all bases and explained everything very clearly.
Much as Gracias
LikeLiked by 1 person
Thank you for the excellent step-by-step guide for KTM 1290 Oil change.
LikeLike
Glad you found it helpful Alex! Ride safe and enjoy!
LikeLike
Thanks for this DIY guide,very helpful👌
LikeLike
Hi followed your instructions but my engine oil low warning in the lcd is coming on until I start the engine
LikeLike
The ABS and oil pressure lights are on by default before you start the bike. Just double check your oil level in the sight glass with the bike held upright and you are good to go.
LikeLike
Very Helpful, thanks
LikeLike
Thank you for this very helpful guide! Very easy to follow. I had a low oil warning after putting the first three litres in (it was to the top of the sight glass!) but stopped the bike and added the other 0.5 and it cleared itself. Topped it up again after a quick ride to between the 1st and 2nd hash marks like the manual says.
Cheers!
Carl
LikeLiked by 1 person
Awesome! Glad it worked out for you Carl. Ride safe!
LikeLike
Hele goede duidelijke uitleg,
bedankt.
Johan Schrijver
LikeLiked by 1 person