
If you own a Scrambler, Hypermotard (796 or 1100) or any of the air cooled Monsters (696, 796, 1100 etc), then the time will come when your timing belts need replacement (every 2 years if you follow Ducati’s recommendation). The good news is that the procedure is easier than one might think and we’ll walk you through it in this step-by-step guide.

Step 1: Remove timing belt covers
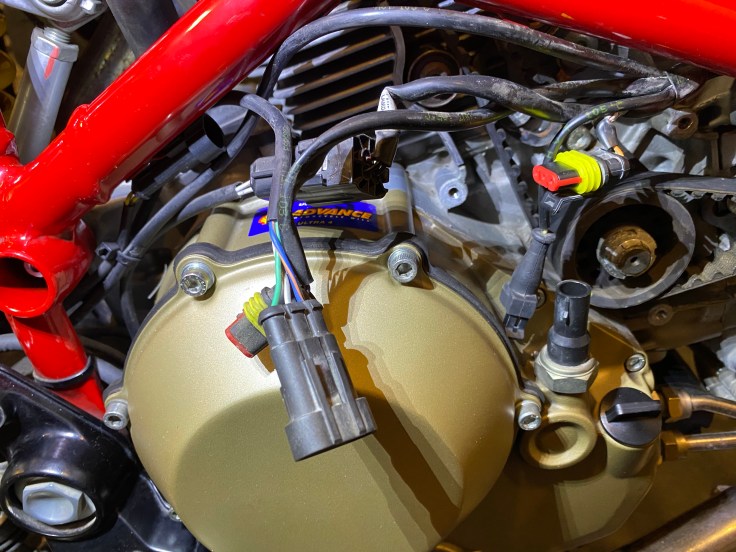
The timing assembly is located on the right side of the bike in the shape of a “V” (or an “L” if you listen to Ducati’s marketing department). Depending on which bike model you have, you may need to remove the fuel tank in order to get the vertical cover off (tank removal is not necessary on the Hypermotard series). You can also make the process easier by disconnecting any of the wiring harnesses that are clipped or zip-tied to the frame in front of the covers.
Take note of the length of the timing belt cover bolts for later as they are often not the same lengths. You can put the bolts back in the covers and set them aside so you know what-goes-where later.
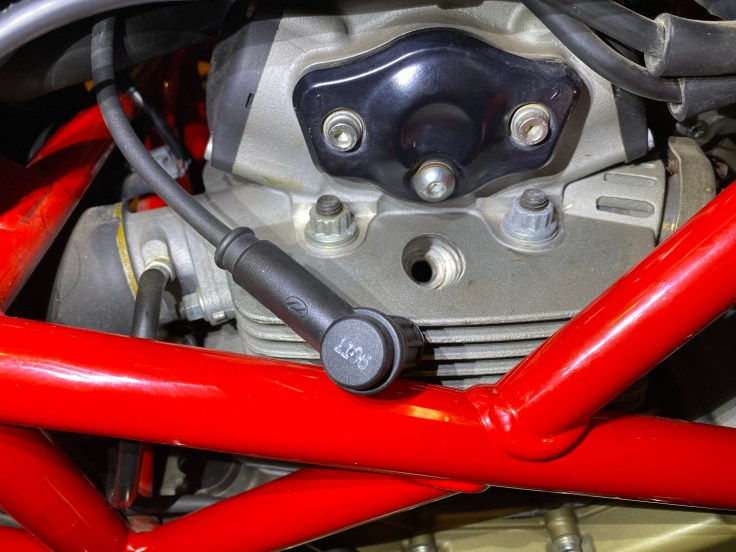
Step 2: Remove spark plugs
Part of the belt change process will require moving the pistons (which are under compression and won’t move unless you pull the spark plugs). Pull the wire off the vertical and horizontal plugs and remove them using a spark plug socket.

Inspect the plugs since you have them out of the bike and consider replacing them if they’re old or fouled.
Step 3: Align the crank at Top Dead Center (TDC)
Using a paddock stand, get the rear wheel off the ground and put the bike in gear.

On the timing belt pulley, locate the dot (may be marked with color as well) and align it with the line on the crank case by rotating the rear wheel. You’re trying to move 2 large pistons so don’t be dissuaded if it takes a little bit of effort to move it.
Step 4: Mark the timing gears
This is the most critical part of the process and may result in serious engine damage if not performed correctly. Using a marking tool, mark the horizontal and vertical cam timing gears by placing 2 marks, starting on the timing gear through to the cam belt cover.
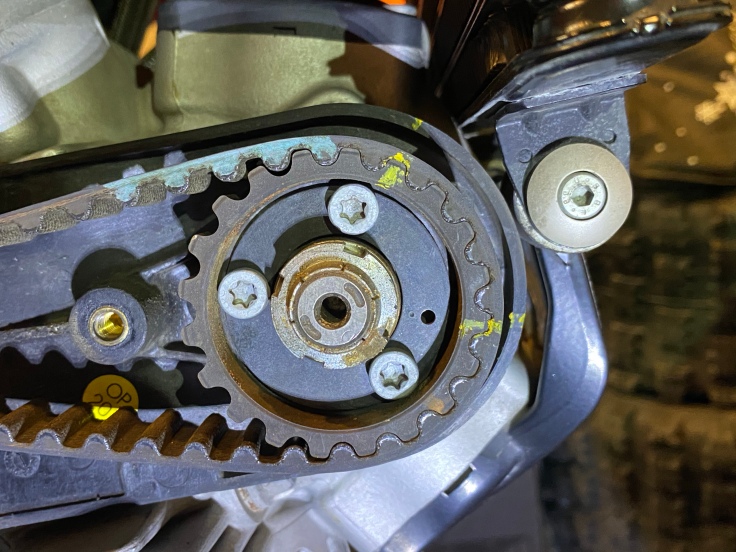
The purpose of this step is to ensure the timing gears do not move while the belts are changed and that if the gears do move, that you can set them back to the same mark so that timing isn’t affected.

Step 5: Loosen horizontal cylinder cam tensioner bolts
Before loosening anything, feel the belt tension and take note of how loose/tight the belts are. This will be a good starting point for later when you re-tension the belts.
Loosen (but do not remove) the 2 bolts holding the cam tensioner in place (highlighted in green below). You shouldn’t need to back the bolts out more than 1/2 turn before the tensioner drops, allowing you to remove the belt.

Step 6: Remove the horizontal timing belt
Gently pull the timing belt off the pulleys, being careful not to rotate the timing gears. A pair of small pliers can be helpful to pull the belt off.
Once the old belt is removed, mark it or cut it so you don’t accidentally mix it up with the new belts.
Step 7: Repeat the process for the vertical cylinder

Step 8: Install new vertical timing belt
Because both the vertical and horizontal belts run off the same drive pulley, you’ll need to install and tension the vertical belt first, then repeat the process for the horizontal belt.
Hold the new belt up to the old belt and double check to confirm that they are the same size.
Slide the new belt on, paying particular attention to keep the belt between the tensioners and to not rotate the timing gear. If the timing gear accidentally moves, turn it manually to re-align the marks you created earlier, then slide the new belt on.
Step 9: Adjust tension on vertical timing belt
Begin by setting the tension to approximately where it was when you loosened the tensioner. This is done by manually pressing the tensioner against the belt, then hand tightening the two cam tensioning bolts.
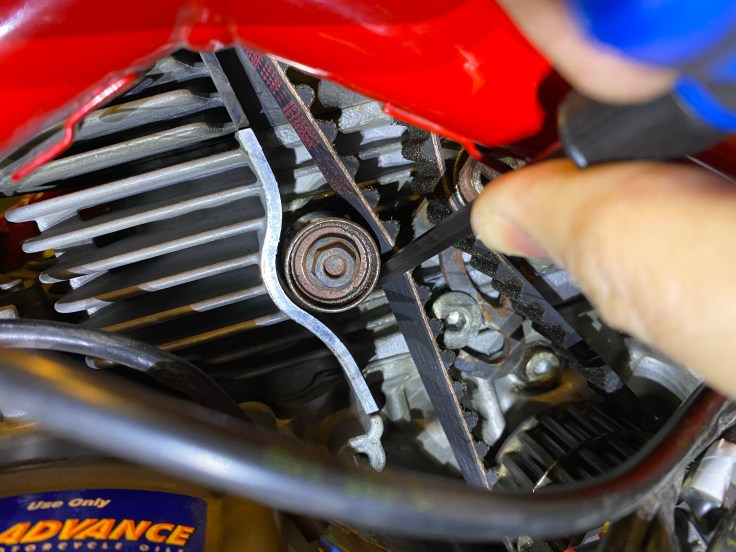
There are a few ways to tension the belts and we have found them to yield similar results. Choose whichever you prefer or use both if you want to be extra cautious.
5mm hex key method: Slide a 5mm hex key between the belt and cam chain tensioner (as shown above). If you can’t fit the key through, then the belt is too tight. If you can fit a 6mm allen key through, the belt is too loose. Ideally, you should have to apply some force and wiggle a 5mm key to get it through and at that point, the tension is correct.
Sound frequency method: As crazy as it may sound, you can adjust belt tension acoustically, using a computer and microphone or a smartphone app. You can then use your finger to “pluck” the belt (like a guitar string) and measure the sound freqency it produces. At the correct tension, the frequency should be between 99-110hz.
Once the belts are set to the correct tension, torque the cam tensioner bolts to the requisite specs (27nm).
Step 10: Repeat installation and tension adjustment process for horizontal cylinder
Step 11: Install spark plugs

Note that the plugs do not need to be more than snug and over-tightening can lead to issues down the road next time you try to pull them. Adding a dab of anti-seize to the thread is good insurance.
Step 12: Start the bike
The moment of truth! Double-check belt tension, cam gear alignment (with the marks you made) as well as torque specs. Once you’re comfortable, start the bike. It should start easily and run exactly as it did before you changed the belts.
Step 13: Re-install cam belt covers
Remember that the bolts are different lengths.

How often should you actually change your belts?
That’s certainly a topic for another post and in the meantime, there’s a good article here. In our opinion, 2-4 years is a fair range for bikes that aren’t ridden to their 12,000km valve interval checks (the logic here is that if you’re doing the valves, you may as well do the belts at the same time).

Nicely done presentation 🙂 – I am interested that you say 5mm hex wrench for both horizontal and vertical. I’ve seen posts where they suggest 5mm for horizontal and 6mm for vertical because it gets hotter …. I used 6mm and it seems very slack but then the engine runs fine ….. although I can see the belt oscillating as the engine speed picks up ….. I had NO success with phone freq. apps 😦
LikeLike
Hi – thank you for an easy to follow practical step by step instruction on the Ducati cam belt change. I own a 2003 Monster 1000s and had spoken to many and watched many video’s on the subject, some complex and all different. Laptop in hand I stepped through the process carefully using your guide without issue, thanks again. The only difficulty was setting the tension as the 5mm Allen key is hex shaped, i think for future I may find a piece of 5mm round bar but that’s more my inexperience than fact.
Next job, belts on my ST3 and then looking at valve clearances, cheers Craig
LikeLike
Dont have the bike, but if I did, would follow this guide. Very well written.
LikeLike
Thanks for the shout out Juicy!
LikeLike