Leaking motorcycle fork oil seals are a common problem. Unfortunately, there is also a common misconception that the only solution is a fork rebuild (or fork oil seal replacement). In this quick tutorial, we will show you how to use an inexpensive product called Seal Mate to remove dirt from your fork’s oil seals which often fixes the problem.
Tools Required
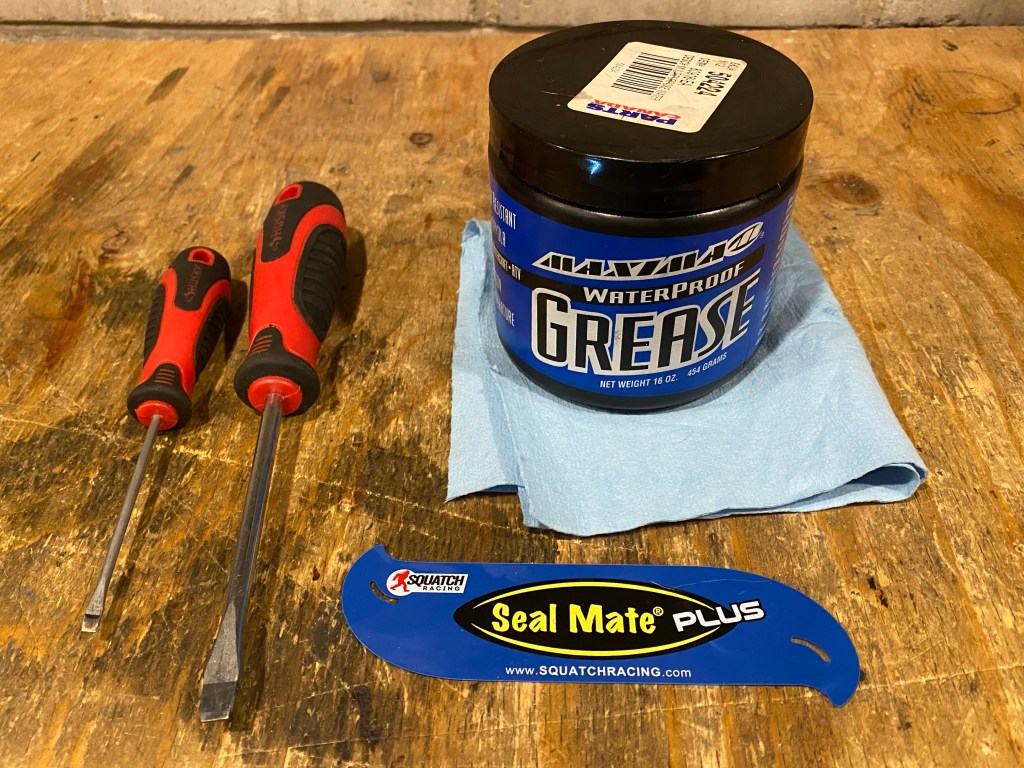
Seal Mate, Seal Mate Plus (available on Amazon), small and medium size flathead screwdrivers, grease, shop towels, WD40 or other spray lubricant (optional).
Theory
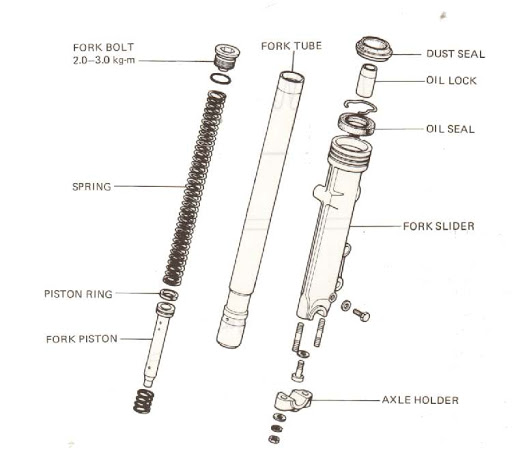
Forks only leak for one reason: the oil contained in the fork tube is getting past the oil seal. The misconception is that this is caused by a worn out or damaged seal. Believe it or not, the most common cause of fork seal leaks is that dirt can get past the dust seal and into the oil seal, cause the oil seal to not seal properly. Therefore, a simple solution is to dislodge the dirt which, more often that not, rectifies the issue. The process is identical for all UpSide Down (USD) forks for all makes and models of on and off road motorcycles and dirt bikes.
Step 1: Remove Fork Dust Seal
To get clear access to the oil seal, you must first remove the dust seal. Dust seals can be stubborn and are made to fit tightly by design. Some are also secured by a metal spring or band which must first be removed by hand.
Dislodge the seal by inserting a very small flathead screwdriver and gently prying it away from the fork slider. If you have trouble getting it off, spraying a bit of WD40 can help get things moving. Once you’ve got the seal away from the fork slider, you can use a larger flathead screwdriver to pry it off completely and slide it down the tube. Just be careful not to use too much force (do not use a hammer!) or you risk damaging the fork tube and could create a new type of leak.
Step 2: Clean the Oil Seals
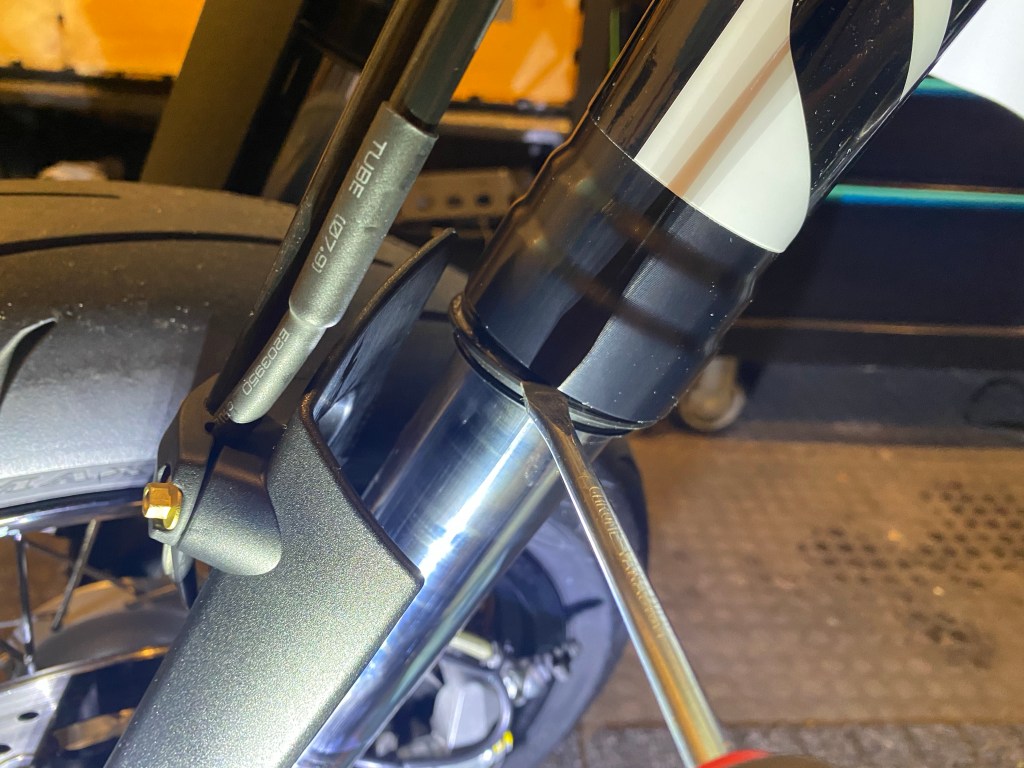
Before you begin this step, take note of the shape of the Seal Mate tool. The part of the tool with the “hook” is what you will be using to get behind the oil seal.
Slide the Seal Mate tool up under the fork slider while pressing it against the fork tube. A few inches up, you will feel the oil seal and will need to coax the tool between the oil seal and the tube, using a sawing motion. Press the tool up to ensure you’re above the oil seal and continue the sawing motion as you make your way around the circumference of the oil seal. Although you can’t see what you’re actually doing, use “feel” to clean around the entire mating surface.

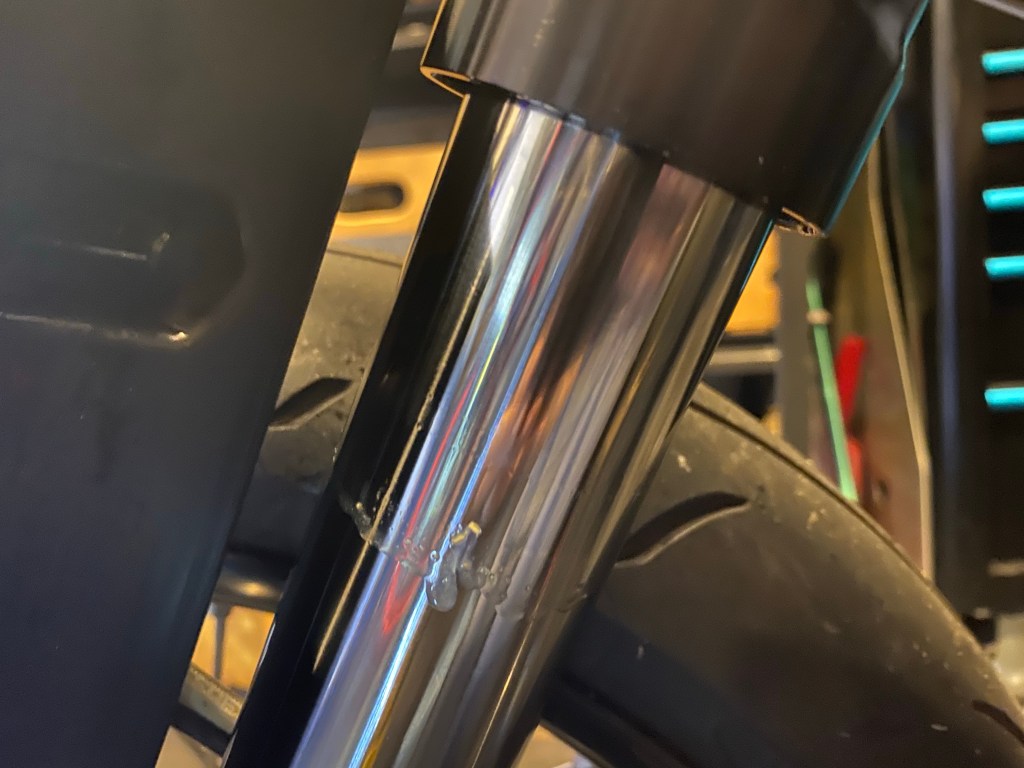
Since you are dislodging the oil seal, it’s normal that a small amount of fork oil will leak out. This is actually a good thing as gravity is pulling down the oil, but also the dirt that may be causing your problem. Often times, you will be able to see dirt or debris in the oil. Once you have cleaned all the way around the seal, wipe the fork tube down with a shop towel. Unless your fork has been leaking heavily for a long time, the small quantity of oil you lost is nothing to worry about.

Step 3: Re-Seat the Oil Seal
An often overlooked step in this process is to ensure the oil seal gets a good mechanical seal against the fork tube and to push down any remaining dirt. This is done by compressing thee fork immediately after cleaning it. Hold the front brake on your bike and bounce the fork 5-10 times as hard as you can. You will likely see a bit more oil on the fork which is normal.
Wipe the fork clean and repeat the process a few more times. If, by the 2nd or 3rd time, the fork is still leaking oil, either the dirt is still preventing a proper seal (in which case you can try cleaning it again) or the oil seal may in fact be worn out (in which case you’ll need to remove the fork and replace the oil seal).
Step 4: Re-install Dust Seal
Before re-installing the dust seal, clean it thoroughly and apply a small amount of grease to help it slide on and help prevent cracking. Slide the dust seal up the fork leg and press it on manually. You should not require any tools or excessive force to re-seat the dust seal.
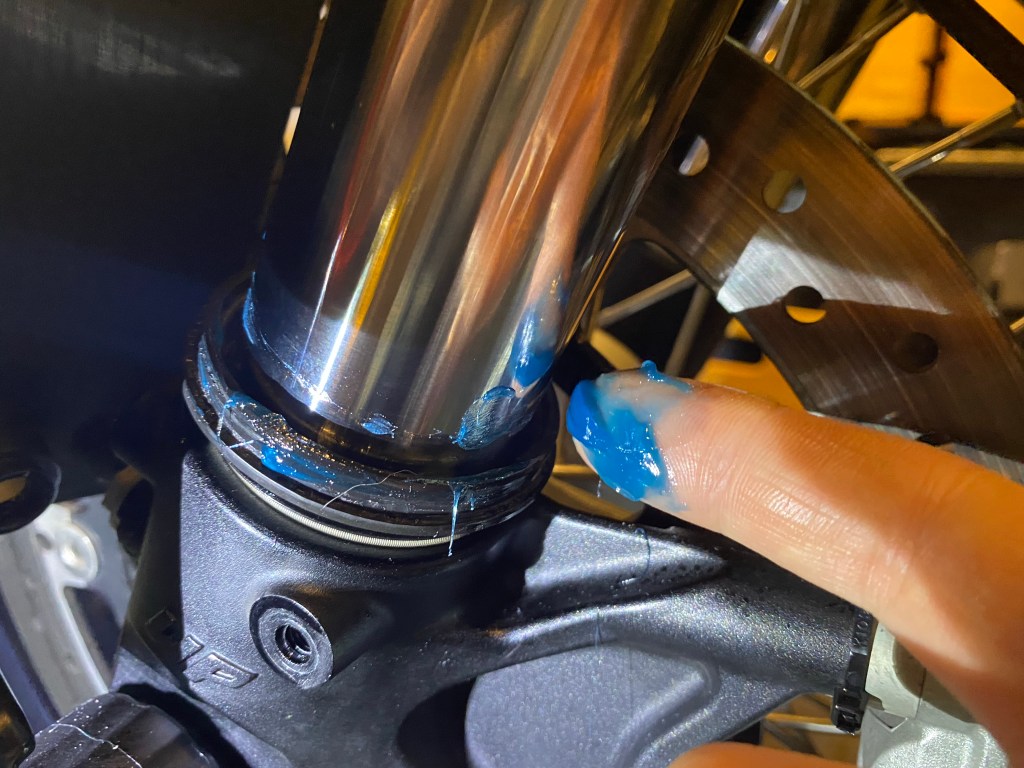
Wipe away any excess grease. Lastly, if your dust seal had a metal spring retainer (as shown below), don’t forget to slide it back into place.

Step 5: Repeat for other side (if needed)
For the next few rides, keep an eye on the forks to make sure there are no leaks and you are good to go!

Leave a comment