
Whether for easthetics or performance, upgrading wheels is a mod on many a rider’s list. In this Chance Moto DIY, we will walk through the process of powdercoating a set of Marchesini forged wheels, including color selection, wheel prep and mounting the new wheels. We also weighed the wheels before and after powdercoating and will provide data on weight savings vs stock.
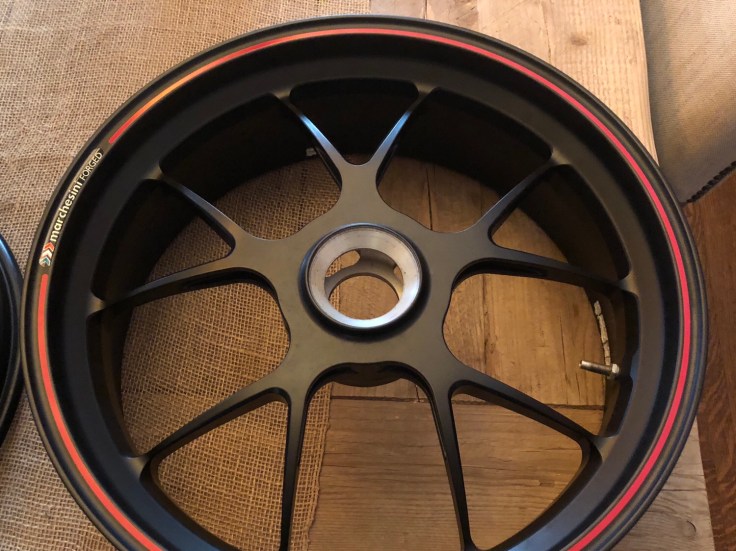
Prepping the wheels is a relatively straightforward process (*assuming you are using a shop to do the surface prep and powdercoating vs doing it yourself). Once the wheels are removed from the bike, remove the front brake discs, bearing seals and wheel bearings, paying careful attention to what-goes-where so that you can re-assemble things correctly later. You will also need to remove the tires (best done at a local bike shop) and ensure you mark any directional wheels/parts for later reference. In the case of these specific wheels (from the Ducati 1098 series), the front is marked as directional.
When it comes to wheel bearings, you may use this opportunity to replace (if they are old/worn or if they require a lot of force to remove) or upgrade them. For the front wheel specifically, we decided to upgrade to ceramic bearings (courtesey of Boca Bearings) which drastically reduces friction and improves longevity.
Depending on their condition, you may also want to take this opportunity to replace the valves themselves. We’re big fans of the 90 degree valves which make tire pressure setting less of a hassle and opted for a set from Strada 7 Racing.

Now that the wheels are prepped, the next question is which color to powdercoat them. Powdercoating can achieve a wide range of colors and finishes but it’s worth noting that selection is limited in comparison to conventional painting. The major benefits of powdercoating are cost and durability (the latter of which is important with wheel finishing as they tent to take a lot of punishment from stones and road debris).
In our case, we were looking for a shade of gold that would closely match what many OEM wheels come in and also happens to feature heavily on Ohlins’ trick suspension parts. A quick search on the web revealed several images of bikes with the color we were after. But how does one match that color to what the local powdercoating shop offers?
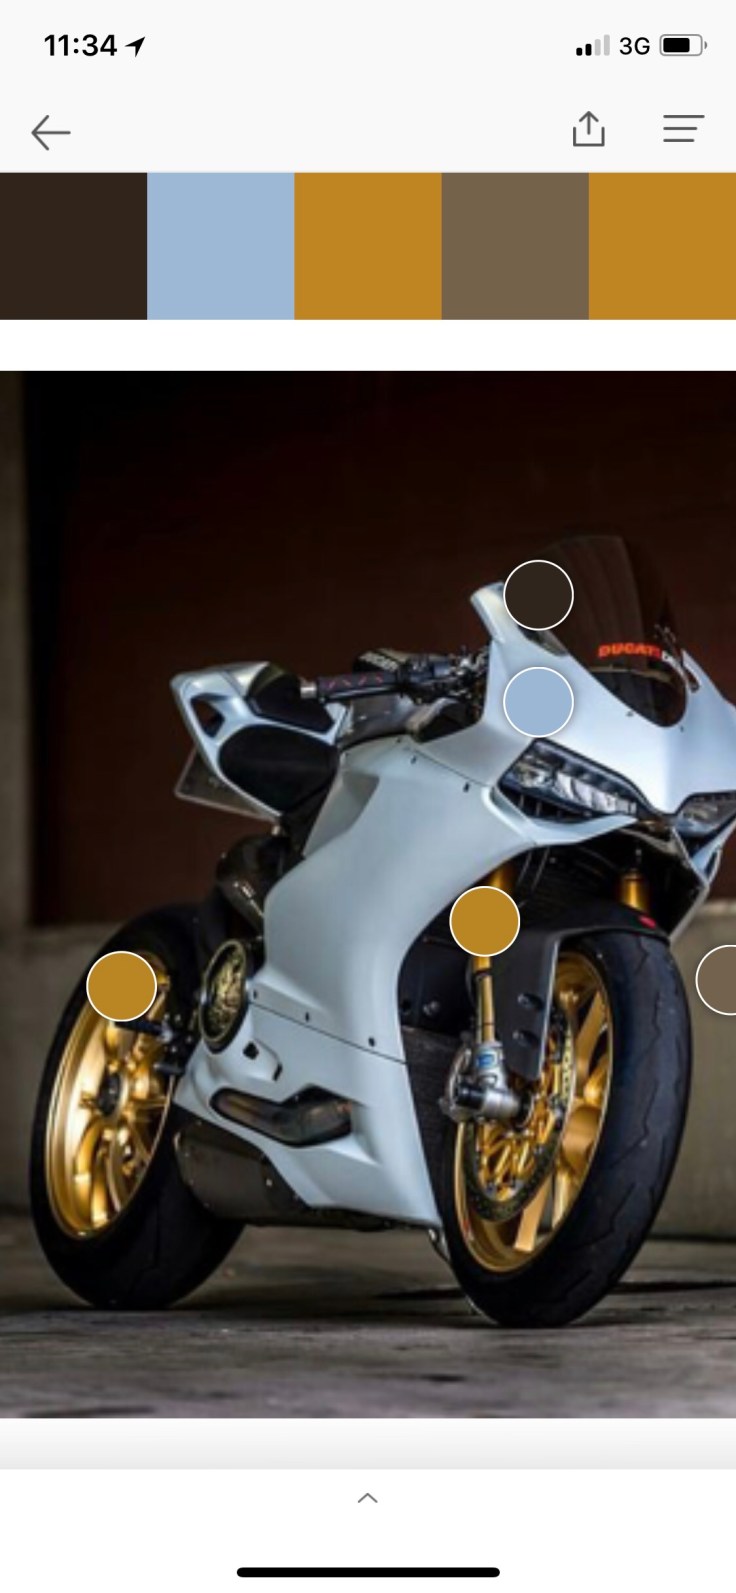
A very accurate way to do this (rather than “eyeballing it”) is to determine the Pantone for this particular shade of gold. For anyone unfamiliar, Pantone is a proprietary color system which is commonly used by designers in order to standardize coloured finishes. Pantone offers an app for iOS and Android that will allow you to extract color codes from pictures on your device. We looked at a variety of pictures that had the shade of gold we were after and isolated the range of finishes down to one or two possibilities.

With the desired finish now identified, we took the wheels to our local powedercoating shop (Union Rim near Toronto, who also did the custom wheels on our project WR250X supermoto) and had a look at the various gold color swatches they offered. Using the same method of taking a picture and analyzing with the Pantone app, we managed to find a swatch that was an identical match for the target Pantone: Transparent Gold over Super Chrome by Prismatic Powders). As the name implies, our chosen colour is a 2-part process which involves first, applying a chrome-like finish to the wheel, then clear-coating with the gold finish to achieve the final effect.
Keeping in mind that lighting conditions, reflections and processing from any camera will skew the true color in any picture, having some data to back up what felt like the right color gave us enough confidence to make the call.

Most shops should be able to turn your wheels around in a week or two. On their end, the process should include stripping the wheels down to the bare metal (using some type of media blasting), then applying whatever combination of base and clear coats are required in order to achieve the desired color. For anyone curious, here’s a quick 1 minute video that explains how powdercoating works. Whoever you chose to do the job, make sure they are aware of areas on the wheels that should not be painted, such as any mounting surface, bolt holes, etc.
Once you get the wheels back from the powdercoating shop, you will want to examine them carefully to make sure that none of the powdercoat was applied to sensitive areas. If there was any spray-over, you can remove it with some light sanding. It’s also a good idea to chase the threads for the brake rotor bolt holes to ensure the bolts will go in without any undue resistance from oversprayed powder.

To retain an OEM look, we ordered a new set of Marchesini decals for the wheels. These can be found on eBay from a variety of sellers (we used Ducati1_shop and can vouch for the decal quality).

The last step is to put everything back together (bearings, seals, valves, brake discs, tires…) and mount the wheels back on the bike.

As it turns out, the color matches the “Ohlins gold” exactly and we’re very pleased with the result.

Weight Calculations:
For anyone who has wondered the total weight savings for moving from cast aluminum wheels to forged wheels, here’s the data from this project:
- Stock (Enkei) cast aluminum wheels: Front: 9.4 lbs (with bearings), Rear: 10.8 lbs
- Marchesini forged aluminum wheels (before powedercoating/stock finish): Front: 6.8 lbs (with bearings), Rear: 7.8 lbs
- Marchesini forged aluminum wheels (after powedercoating): Front 6.9 lbs (with bearings), Rear: 8 lbs
- Total weight savings (vs stock wheels): Front: 2.5 lbs, Rear, 2.8 lbs (5.3 lbs total)
- Total weight added by powedercoating (vs stock finish): Front: 0.1 lbs, Rear, 0.2 lbs (0.3 lbs total)
