
Replacing the engine air filter in Ducati’s Air Cooled Monsters is a relatively simple, yet often overlooked maintenance item. Getting clean air into your motor is a critical part of keeping it performing the way it should, so we’ve put together this simple guide to walk you through the process.

What you’ll need:
-Ratchet
-4mm, 5mm and 8mm allen (hex) sockets, or equivalent
-8mm wrench or socket
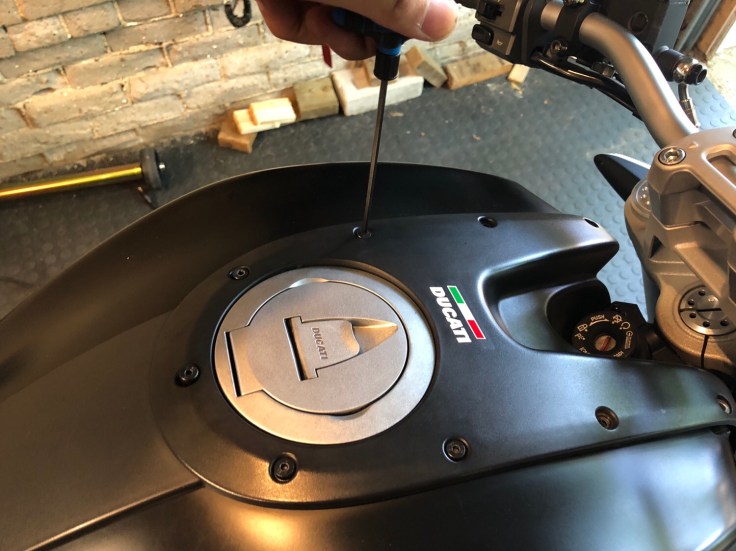
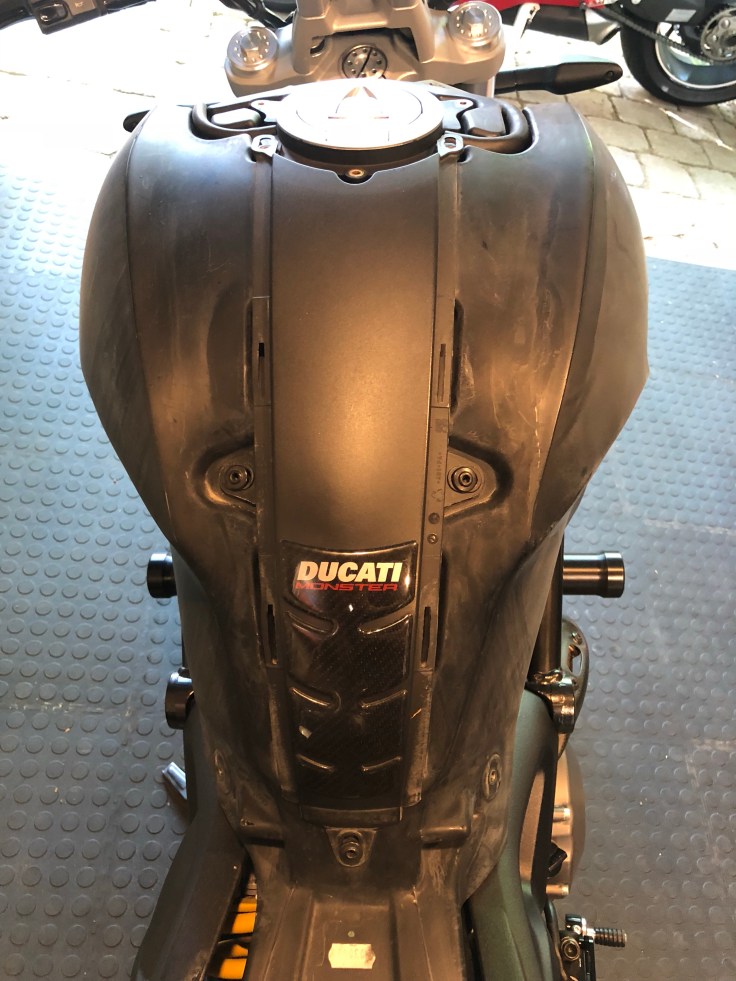
Step 1: Remove 3 primary tank panels
The Monster series of this generation has a “faux tank” that’s covered by a few panels which are easily removed (or interchanged, if you are after a new look). Most of the bolts you need to remove are around the fuel cap guard which also secures the side panels through an interlocking tab system (more on that later). Once the 11, 4mm top bolts are removed, there are 2 more on each side (4mm and 5mm respectively) for a total of 15.
Once the bolts are removed, carefully pull apart the 3 primary tank covers. Note that you do not need to remove the lower middle panel which runs from the fuel cap down to the seat.
Step 2: Remove (displace) fuel cell
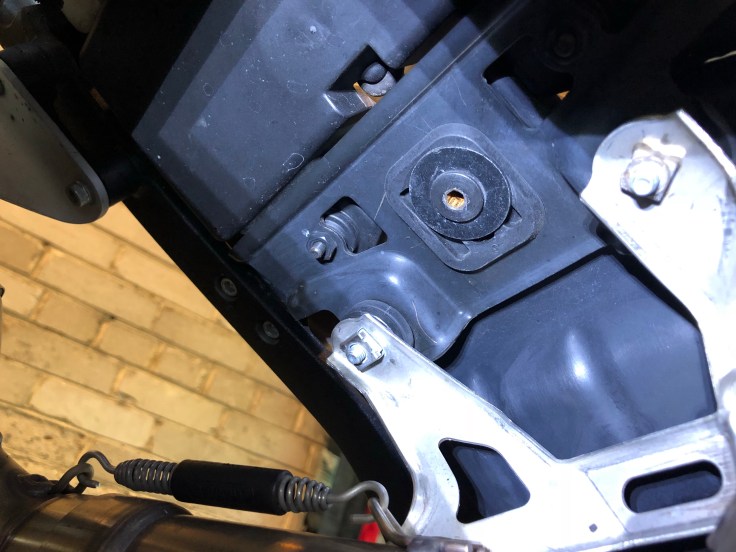
There are only 3 bolts that secure the fuel cell to the frame. The main bolt is an 8mm hex which is located under the bike at the rear between the exhaust cans. If you’ve never taken this bolt our before, it may be tight so take your time and be careful not to round it off.
While you are under the back of the bike, you can save yourself some agony by un-clipping the O2 sensor wire which runs on the underside of the fuel cell. This will come in handy when you are pushing and pulling on the tank to make room later.

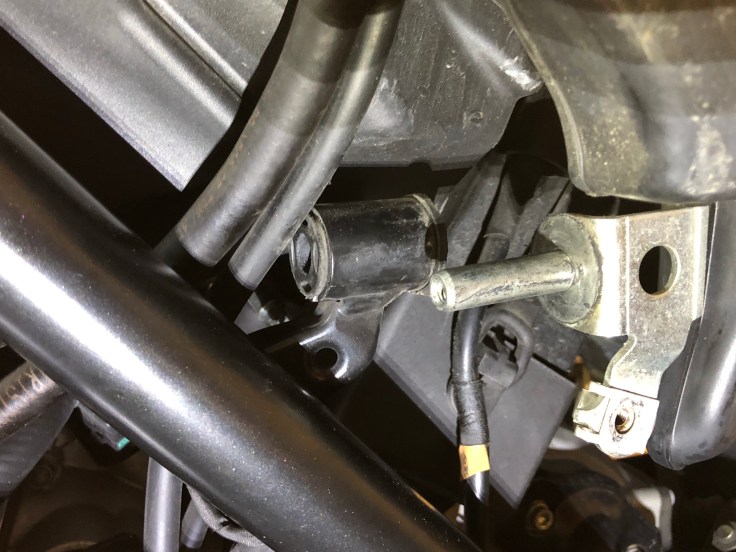
The other 2 bolts that secure the tank are on the left and right sides, near the frame. Use the 8mm wrench to remove the bolts and be sure to keep the retaining washer that’s on it.
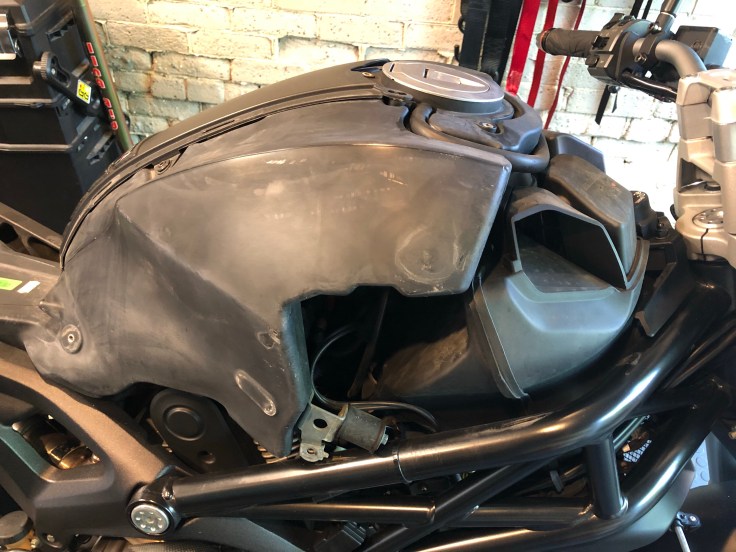
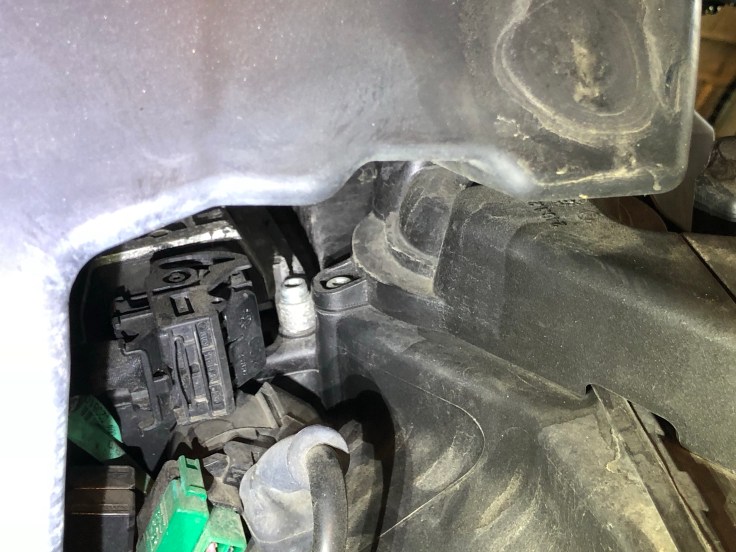
With the 3 bolts removed, you can now gently coax the fuel cell out of its resting place by sliding it rearward. Note that you do not need to completely remove the fuel cell from the bike or disconnect any fuel lines. You only need to make enough room at the front of the fuel cell to access the air filter cover (shown below). As you slide the tank back, be aware of the wires and fuel lines that are attached to it so as to not disconnect or sever anything by accident.
Step 3: Remove air filter cover / air filter
With the top of the fuel cell out of the way, you can now turn your attention to the 3 bolts that secure the air filter cover to the airbox. There are 2 at the front of the cover and one at the rear.

If you’ve left the tank on the bike, the 3rd bolt at the rear of the cover is a little tricky to reach but you should be able to make enough room under the tank to get a ratchet in there with a hex socket. Note that all these bolts are all holding plastic pieces together so they aren’t tight from the factory and you won’t need a torque wrench when putting things back together. Hand tight will suffice.
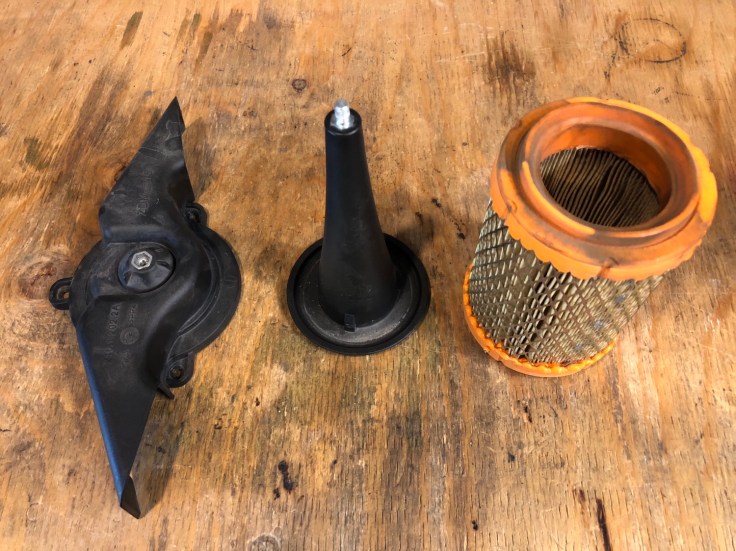
Once the 3 air filter cover bolts are removed, there are 2 ways to get the cover and air filter off the bike. 1) If possible, you can remove the entire cover and filter as single assembly by sliding it upward and out of the airbox. 2) Alternately (or if you have a stubborn cover), you can remove the larger hex bolt that secures the air filter to the cover, then remove the cover, filter and “filter holder” separately.
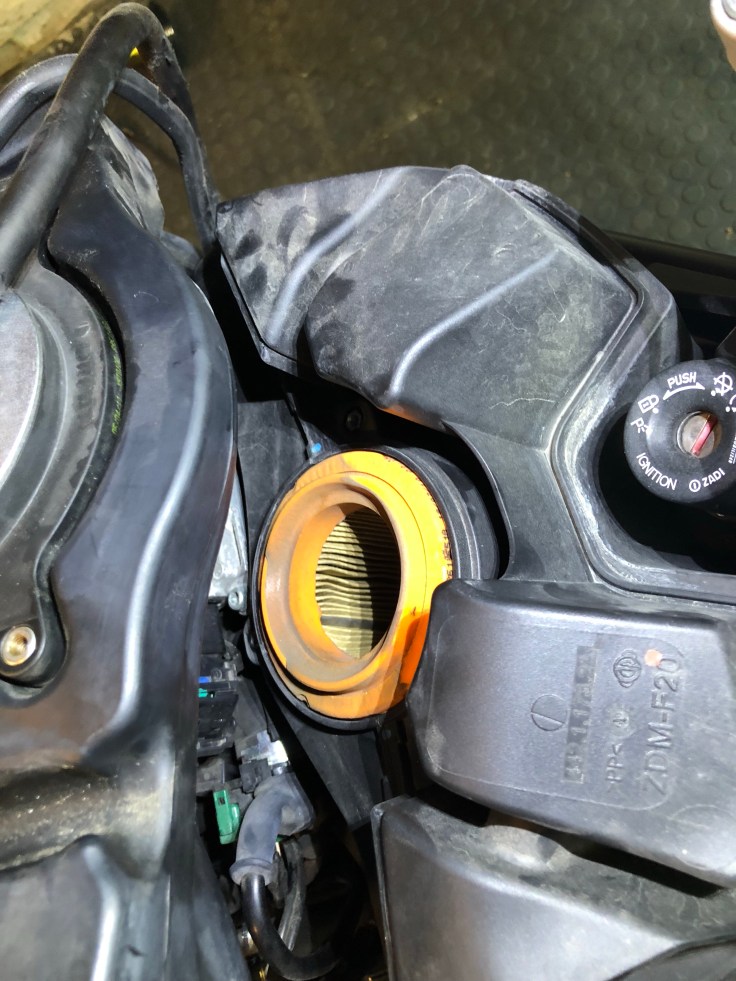
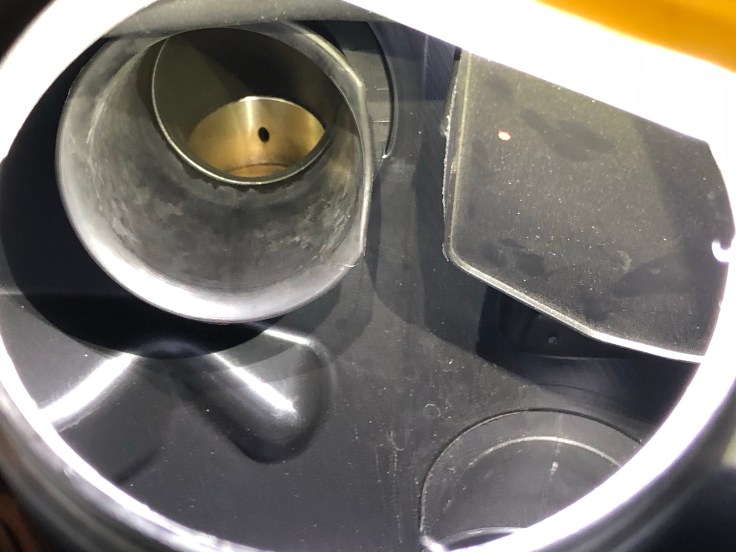
Step 4: Inspect airbox & (used) filter
Once you have the cover and filter out of the bike, take a minute to inspect the parts and assess their state of wear and cleanliness.
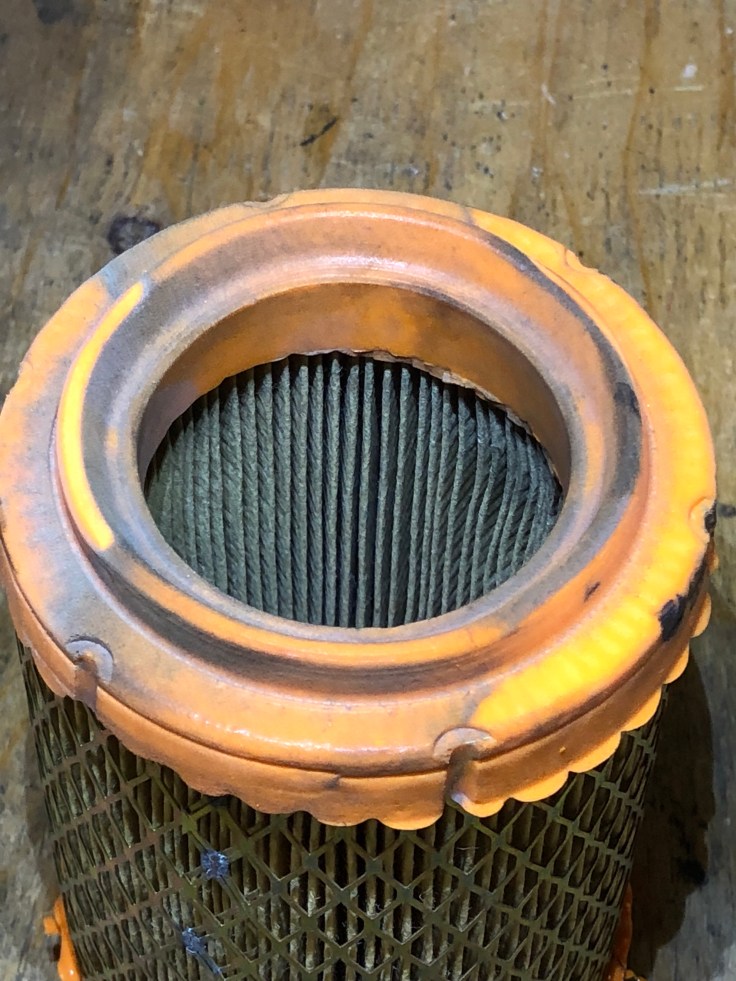
Take a look inside the air filter (as the Monster’s system filters from the inside out) and you should be able to see if it needs replacing. It’s hard to put an exact time or mileage number on air filters since riding environments will greatly affect how dirty the filter gets. A good general guideline is that you should check, and if necessary, replace the filter every time you do the valve inspection (12,000 kms / 7,500 miles).
Your airbox is like the lung of your motorcycle so ifs inside looks like a smoker’s lung, you’re late on your filter change or have a bad seal on your air filter. Take a good look inside and be sure to remove any insects or leaves that may have fallen out when you pulled the air filter. You can also use a damp cloth to wipe out the inside of the airbox, if you’re a perfectionist (admittedly, we did!).
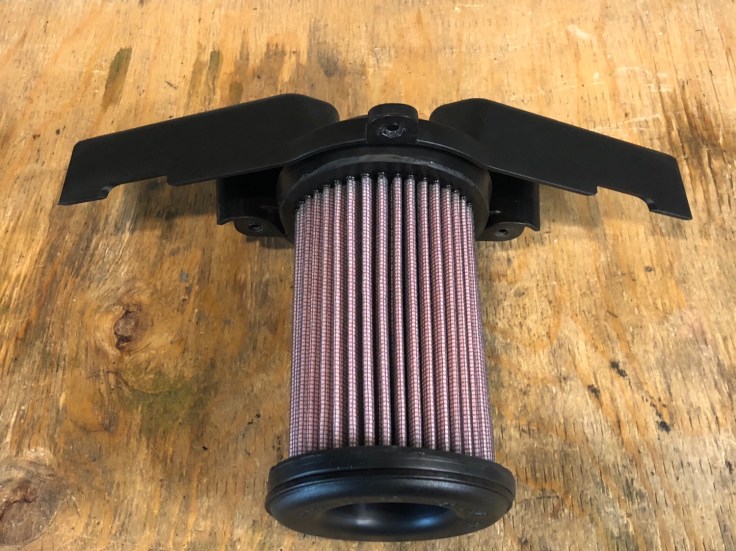
Step 5: Install new air filter
With the airbox cleaned and inspected, you can now mount your new filter on the cover assembly. In our case, the new filter is a re-usable K&N (part # DU-6908). Note that the filter is directional as it has a different seal on each end (the same is true of the OEM filter). The thinner of the two seals goes at the bottom and the thicker one at the top, as it forms the seal against the airbox, once the cover is in place.
Step 6: Re-install fuel cell and body panels
With the cover back on the airbox, you can now begin putting things back together in reverse order. Be particularly careful when sliding the fuel cell back in place and take a look at fuel lines and battery leads (at the front of the tank) to make sure nothing has gotten pinched or disconnected. Remember to re-route the O2 sensor wire at the back, under the seat.
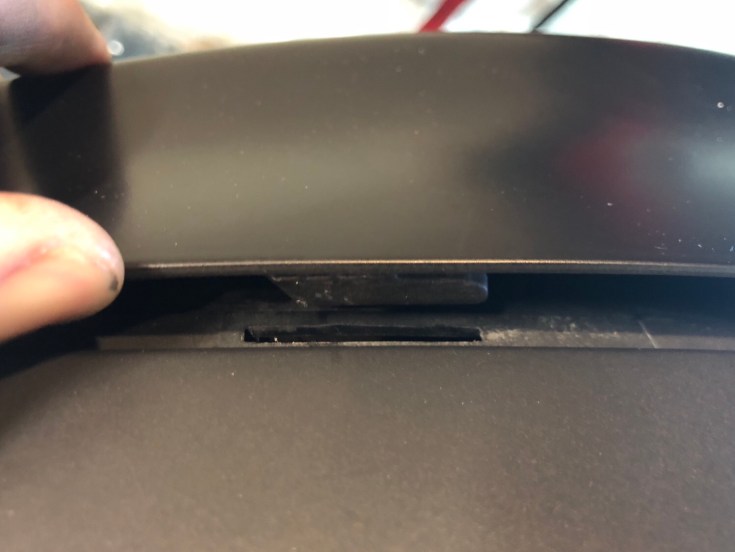
When putting the tank panels back together, notice the interlocking tabs and be gentle when sliding them so as to not snap anything off. If you’ve put the fuel cell back in its original spot, the panels should snap into place quite easily. If the pieces don’t fit, there’s a good chance you didn’t re-install the fuel cell correctly so check your work.
Step 7: Start bike and test ride
Once you’re satisfied that everything is back together, start the bike and take it for a ride. The filter change shouldn’t change anything, performance-wise but your motor will thank you for it ;).

A great write-up. This helped me check the air filter on my 796.
LikeLike
I just bought the M796 less than a week ago, and the car is already 13 years old. I’m not sure if the previous owner did any routine maintenance. I’m glad this article exists. It helps me a lot!
LikeLike