
Replacing the front brake pads on your FZ-09 is a very simple procedure which we will walk you through in this 7 step Chance Moto DIY.
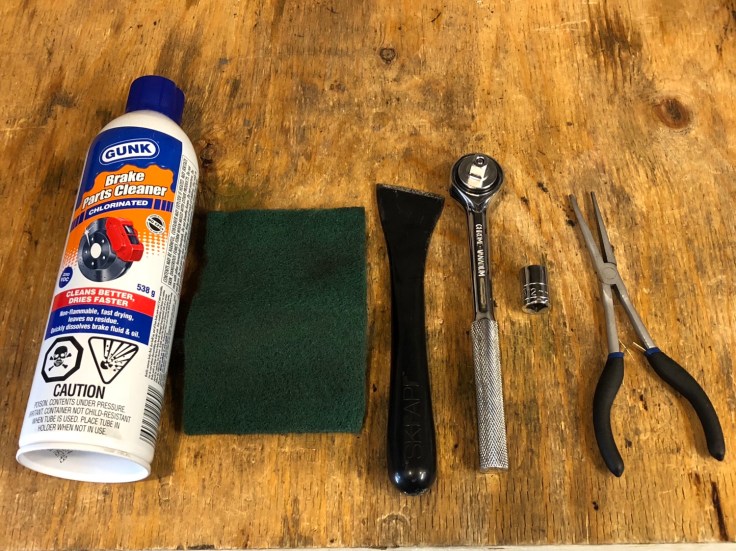
Tools You’ll Need:
-Ratchet and 12 mm socket
-Torque wrench
-Needle nose pliers
-Scouring pad (eg. Scotch Brite)
-Brake cleaner
-A non-metallic prying instrument (spatula, piece of wood, etc)
-A pig mat or oil drain pan (to contain brake fluid overspray)
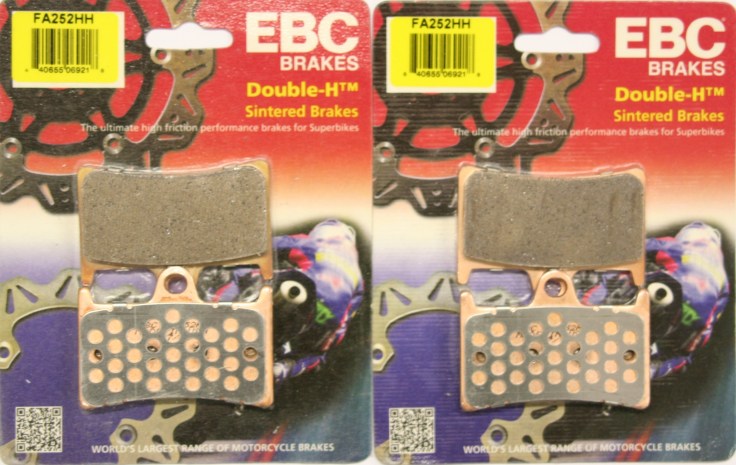
Parts You’ll Need:
Pick up 2 sets of your brake pads of choice (one for each side). We went with EBC’s Double-H Sintered pads (part # FA252HH) which we found to offer superior stopping performance to the OEM pads and are well matched to the FZ-09’s sporting character.
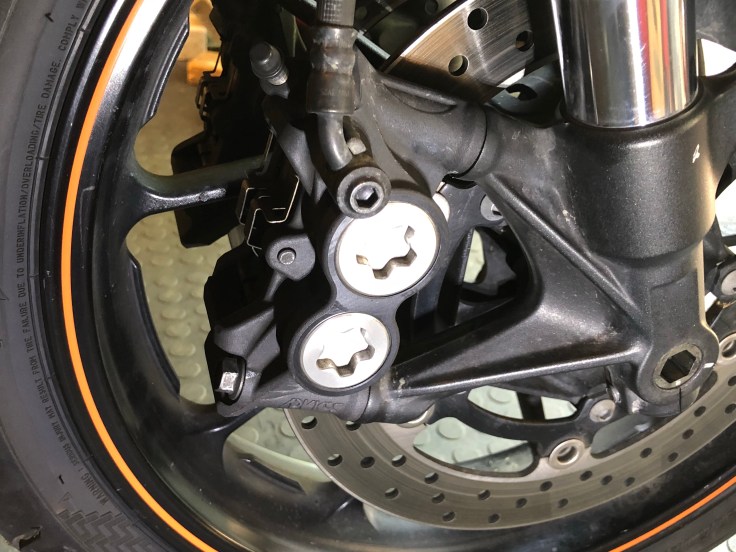
Step 1: Remove Calipers
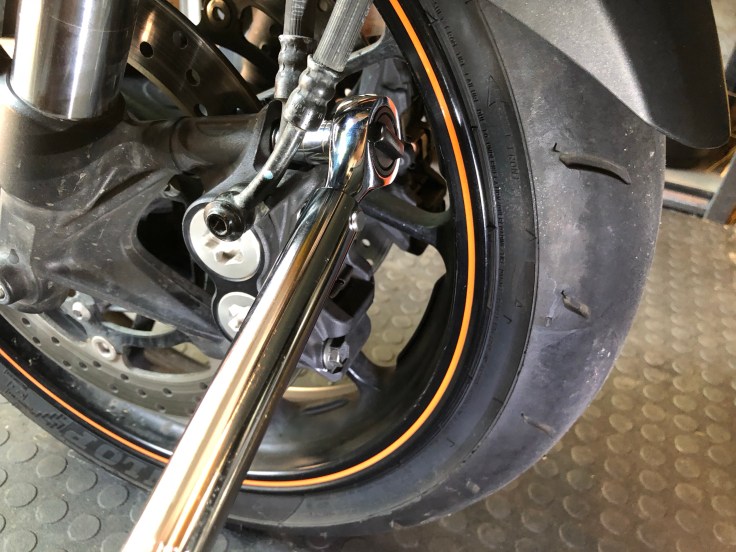
Begin by putting the rear of the bike on a paddock stand (if you have one -otherwise, side stand is fine). Remove the 2 x 12mm bolts (top and bottom) that hold the caliper to the fork. Once the bolts are removed, pull the caliper rearward, away from the the disc. Take your time during this step to avoid any metal-on-metal contact between the caliper and the front rim which will inevitably scratch the rim. Clearance should not be an issue but if you do find it snug, grip the caliper tightly with your hand and press the pads against the rotor to drive the pistons back into the caliper and create extra room to manoever. Repeat the process on the other side.
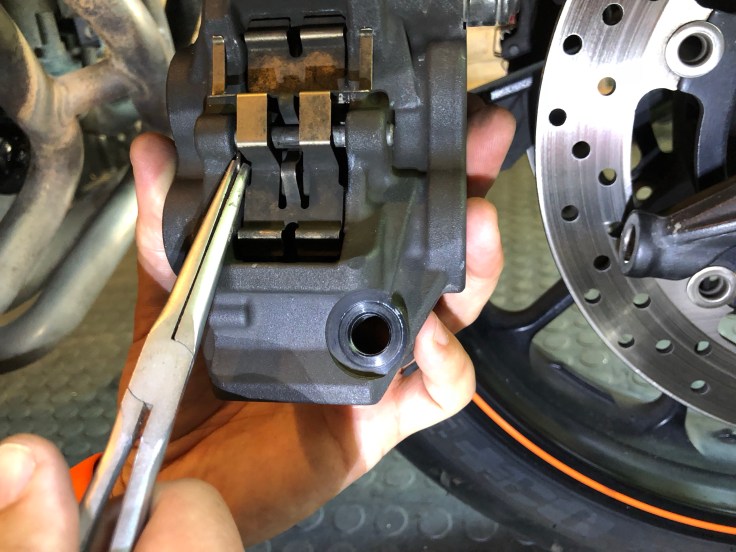
Step 2: Remove Old Brake Pads:
Locate the 2 x cotter pins that secure the pads and pull them out with a pair of pliers. The metal dowel that holds the pads in place can then be removed. If it’s stubborn, you can use brake cleaner, along with a mallet, drift or punch to slide it out.
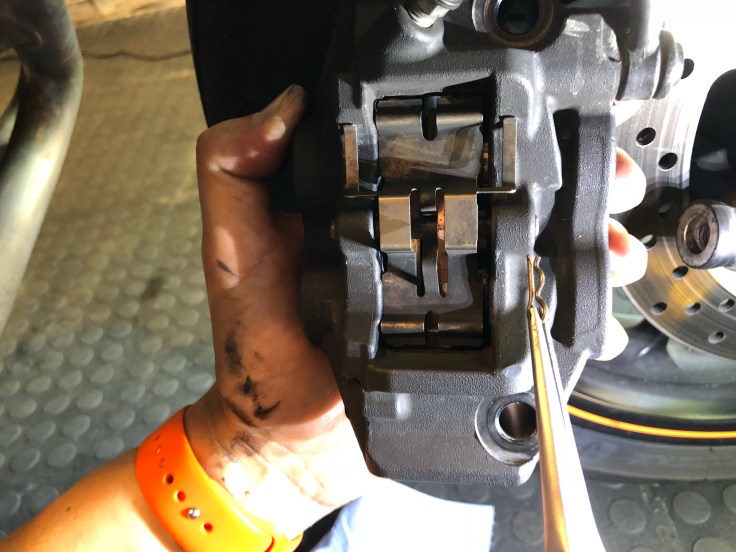
Before removing the pads, take a look at the wear pattern and make note of any abnormalities. Uneven wear may be a sign of issues with the pistons/seals or master cylinder.

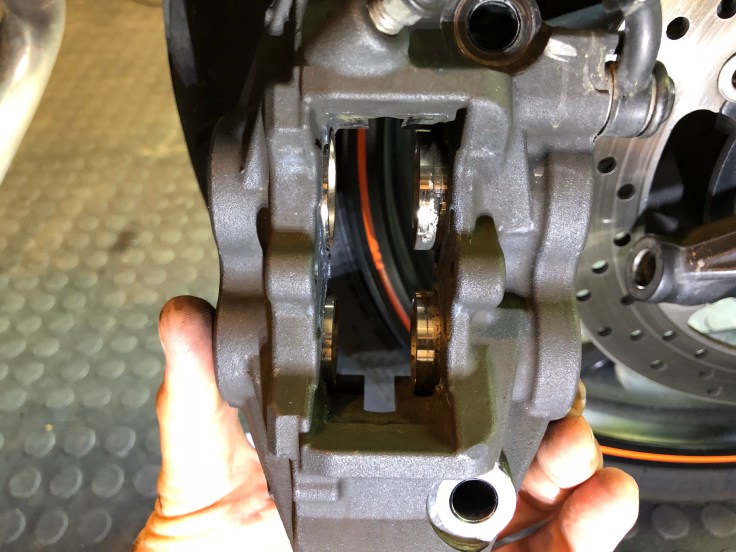
Step 3: Inspect and Clean Calipers:
Remove the brake pads and take a look inside the caliper. It’s normal for there to be an accumulation of brake dust and road grime which we will be removing in this step.
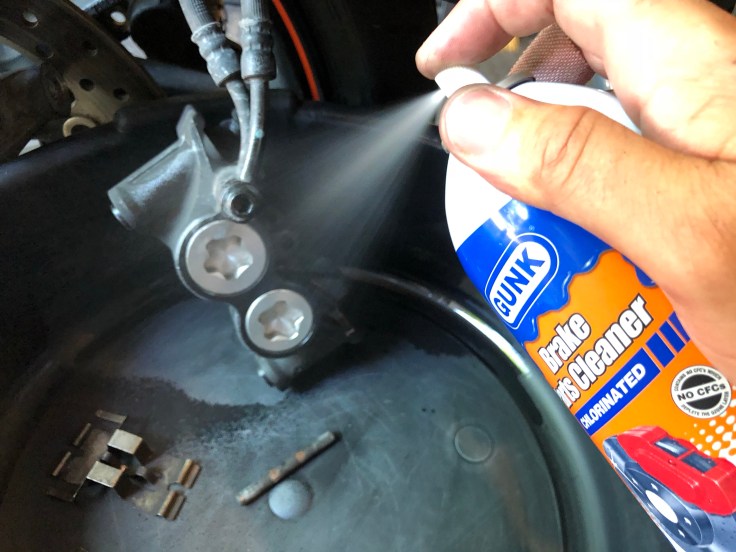
Spray brake cleaner liberally on the inside and outside of the caliper to dislodge brake dust and debris. Work the pistons with your fingers and apply brake cleaner liberally to get them moving smoothly. Use a pig mat or oil drain pan to contain the overspray. If you are really particular, you can use rags and toothbrushes to get every last bit of brake dust out. The brake fluid will evaporate naturally but you can accelerate the process with a shop towel.
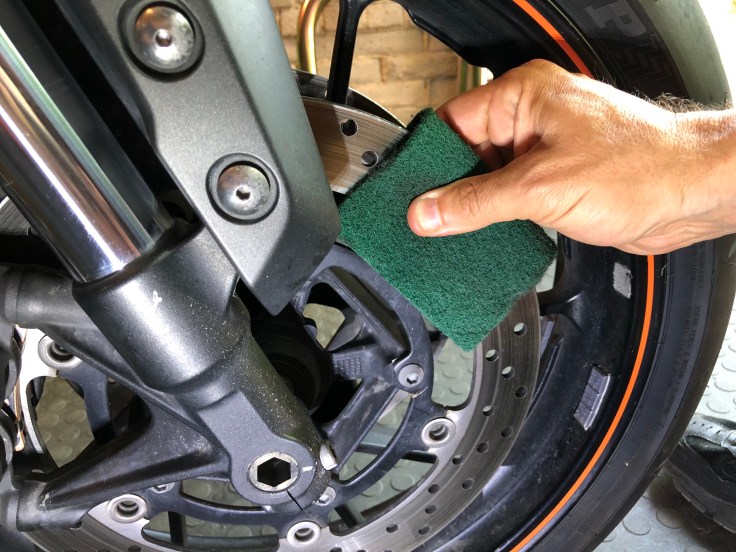
Step 4: De-Glaze Rotors:
An important but often-overlooked step is the de-glazing of the brake rotors. Using the scouring pad, scrub the inside and outside of each disc to remove the accumulated old braking material and prepare the surface for the new pads. This step if easier with a front end stand (aka “headlift”) which will allow you to spin the wheel freely. If you don’t have one, you can just rotate the wheel and de-glaze the rotor in sections.
Step 5: Replace Brake Pads:
Now that everything is clean, you can replace the brake pads in the calipers. The pads are identical so it doesn’t matter which side goes where. Secure the pads and protector plate with the metal dowel and cotter pin.
Step 6: Install Calipers:
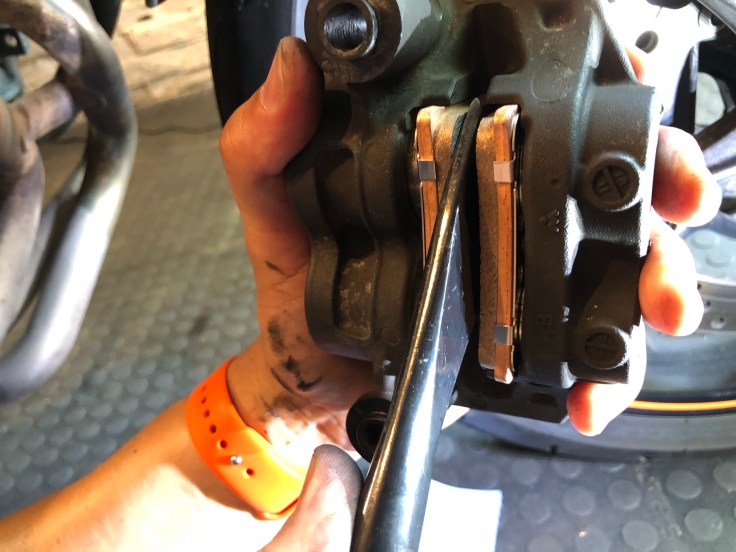
Installing the calipers is relatively straightforward with one exception. Since the new pads are thicker than the outgoing worn pads, you will need to pry them apart so that they slide over the discs. You do not want to use anything hard or sharp for this step to avoid scoring the new pads. A pastic spatula or a piece of wood will do the trick. Gently push the pads back into the caliper.
Hand-tighten the 2 x 12mm bolts that hold the caliper in place, then torque to the recommended specification (34Nm).
Step 7: Bed and Test new Brakes:
IMPORTANT: Pump the front brake lever several times until you feel the pads make contact with the rotors. Make sure you do this before taking the bike out to test the brakes to avoid a potential disaster…
Standing beside the bike, roll forward slowly and apply the front brake a few times. If the lever is firm and the brakes are grabbing, suit up and go for a short ride.
The objective of “bedding new brake pads” is to achieve a consistent, uniform mating surface between the new pads and the discs and maximize their efficiency.
To bed the brakes, accelerate to a modest pace (2nd gear) and gently apply the front brake, using even pressure. Pay particular attention to the feel of the lever. It should be firm and consistent. Any pulsing or fading can be a sign of other issues within the brake system (warped rotors, air in the brake lines, etc). Repeat 7-10 times until you are comfortable with the feel of the new brakes and have gotten some heat into the pads. Complete the process by accelerating to 3rd gear cruising speed and braking progresively to come to a stop. After a few repetitions, the brakes should perform equally well, or better than before.

nice tuto. can you make one for rear brake
LikeLike
Hey Sharky. We don’t have the bike handy any more but will post a follow up when we work on one next if you want to subscribe.
LikeLike
Thank you for sharing tthis
LikeLike